
Sharp corners, eerie shadows, and a spread that practically screams “dig in”—that’s what you get when you set the stage with a coffin charcuterie board. The first time I pulled together this spooky snack setup for my annual Halloween bash, the reaction was priceless. Guests circled the table, phones out, snapping pictures as if the cheese and salami had come alive. Honestly, it’s not just a conversation starter—it’s the life of the party.
I’ll admit, my obsession with themed boards started a few years back, right after I realized how bored I was with basic cheese plates. The coffin charcuterie board is way more than a pile of snacks; it’s a playful centerpiece that adds drama and fun to your Halloween spread. Whether you’re hosting a crowd of costume-wearing kids or a bunch of adults who still love a good fright, this board has everyone reaching for seconds.
There’s something oddly comforting about combining familiar flavors with a dash of visual flair. It’s like inviting everyone to play with their food (just a little)—and who doesn’t love that? After trial and error (don’t ask about my failed attempt with blue cheese ghosts), I’ve landed on a combination of bold, savory bites and sweet, unexpected treats. If you’re looking for a showstopper that’s easy to put together, customizable, and guaranteed to impress, this coffin charcuterie board deserves a spot on your Halloween party menu.
Why You’ll Love This Coffin Charcuterie Board
- Quick to Assemble: Honestly, you can pull this coffin charcuterie board together in less than 30 minutes. That means more time to focus on your costume or haunt the house!
- No Fancy Ingredients Needed: Most of the meats, cheeses, and snacks are grocery store staples. You won’t be running all over town looking for rare or expensive bites.
- Perfect for Halloween Gatherings: Whether it’s a kids’ party, adult cocktail hour, or a cozy family movie night, this board fits right in. Everyone loves picking and choosing their favorites.
- Visually Striking: The coffin shape grabs attention immediately. It’s Instagram- and Pinterest-worthy (trust me, your guests will want photos before they eat).
- Customizable for Dietary Needs: You can go gluten-free, vegetarian, or even add vegan options. The board is your canvas.
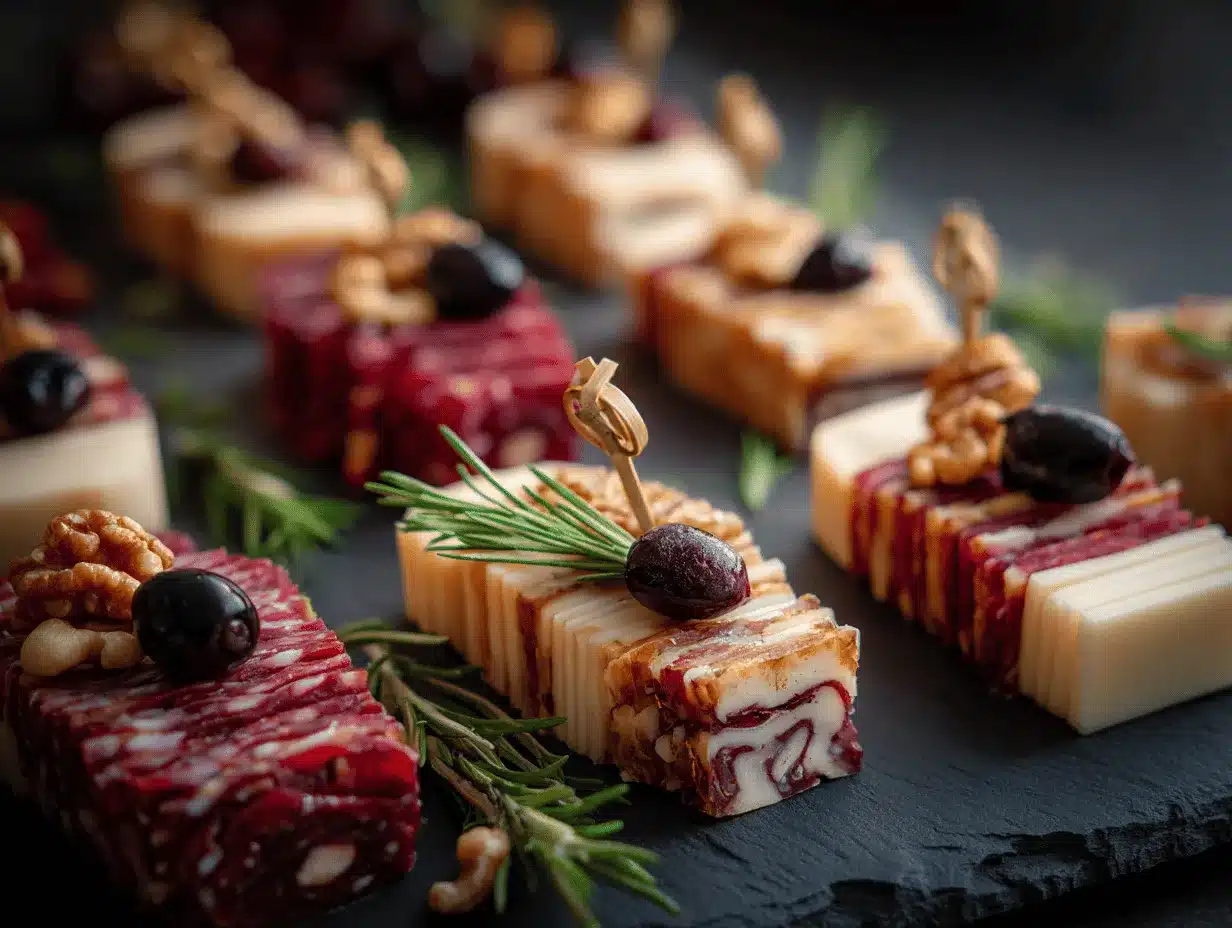
What really sets this coffin charcuterie board apart is the mix of textures and colors. I’m talking streaks of creamy brie, piles of deep red salami, and pops of orange cheddar—plus those little edible “bones” for a creepy finish. I always blend in a few unexpected flavors, like sweet figs or spicy nuts, to keep everyone guessing. After testing different layouts and snacks (the gummy worms are always a hit!), I’ve found a balance between spooky and satisfying.
This isn’t your average cheese plate—it’s an edible centerpiece that makes the whole night more memorable. There’s something about gathering around the coffin charcuterie board, laughing, and nibbling that brings out the kid in everyone. It’s comfort food with a Halloween twist, and you don’t need to be a pro chef to pull it off. Even the pickiest eaters find something to love, and you get all the credit for creating a masterpiece they’ll talk about all year.
Ingredients Needed
This coffin charcuterie board relies on a core mix of savory, sweet, and crunchy bites. I like to think of it as a mini haunted house—every snack plays a role in the spooky scene. Most ingredients are easy to find, and you can swap things based on your crowd’s favorites or dietary needs.
- For the Board Foundation:
- Coffin-shaped serving tray or large rectangular wooden board (lined with parchment cut into a coffin shape if needed)
- Meats:
- Salami slices (about 6 oz / 170 g)
- Prosciutto (about 4 oz / 115 g)
- Capicola or spicy cured meats (about 4 oz / 115 g)
- Pepperoni rounds (about 6 oz / 170 g)
(I love using Boar’s Head or Creminelli—good flavor and easy to fold!)
- Cheeses:
- Brie or Camembert wheel (about 8 oz / 225 g)
- Sharp cheddar, cubed or sliced (about 8 oz / 225 g)
- Goat cheese log, rolled in black pepper or herbs (about 4 oz / 115 g)
- Swiss or Gruyère, sliced (about 6 oz / 170 g)
- Mini mozzarella balls (“eyeballs”) (about 6 oz / 170 g)
(Trader Joe’s and Tillamook are tried-and-true for flavor and texture.)
- Crackers and Bread:
- Black sesame crackers or charcoal crackers (for spooky color, about 4 oz / 115 g)
- Thin breadsticks (“bones”) (about 4 oz / 115 g)
- Mini crostini or rye crisps (about 4 oz / 115 g)
- Gluten-free options (swap in almond flour crackers for sensitive guests)
- Fruits & Sweets:
- Black grapes or Concord grapes (about 8 oz / 225 g)
- Dried apricots or figs (about 4 oz / 115 g)
- Fresh strawberries, halved (about 8 oz / 225 g)
- Gummy worms or candy eyeballs (for decoration, about 2 oz / 60 g)
(Seasonal berries work great if you can find them!)
- Extras and Garnishes:
- Olives—black and green (about 6 oz / 170 g)
- Roasted almonds or spicy nuts (about 4 oz / 115 g)
- Honey or fig jam (about 2 oz / 60 g)
- Fresh rosemary sprigs (“creepy greenery”)
- Edible flowers or microgreens (optional, for extra flair)
Don’t stress if you’re missing something—swap in whatever you have. A few times I’ve used sliced apples instead of grapes, or swapped in veggie chips for crackers. Just aim for a mix of colors and textures. This coffin charcuterie board is super forgiving, so get creative with your favorites!
Equipment Needed
- Coffin-shaped board or tray: You can buy coffin serving boards online, or just cut parchment into a coffin shape and lay it on a large rectangle board. I’ve even used a baking sheet in a pinch—works fine!
- Cheese knives and small forks: Makes serving and spreading easier, especially for soft cheeses.
- Small bowls or ramekins: Perfect for jams, honey, or loose items like nuts and olives.
- Mini tongs or cocktail picks: These help guests grab items without making a mess—plus, they look festive.
- Cutting board and sharp knife: For prepping meats, cheeses, and fruits. I use my trusty bamboo board for everything.
If you don’t have a coffin board, don’t worry! A regular wooden board or even a tray lined with parchment will do the trick. Clean up is easy—just wipe down with warm soapy water. For cheese knives, I always hand-wash and dry them immediately to keep them sharp (learned that the hard way after a rusty mishap). If you’re on a budget, dollar stores often have cute Halloween trays that work perfectly. No need for anything fancy—just a bit of creativity!
Preparation Method
- Prep Your Board Foundation (5 minutes)
Lay out your coffin-shaped tray or line a rectangular board with parchment cut into a coffin shape. Make sure your workspace is clean, and gather all your ingredients nearby for easy access.
- Slice & Portion Meats and Cheeses (10 minutes)
Slice cheddar and Swiss into thin strips or cubes. Cut the brie into wedges. Arrange salami, prosciutto, and pepperoni in loose folds or small stacks. If you’re using mozzarella balls, set them aside for “eyeballs.” Tip: Keep cheeses cold until just before assembly for clean cuts.
- Arrange the Coffin Outline (3 minutes)
Start by outlining the coffin shape with breadsticks or crackers. Stack them vertically or horizontally to create crisp edges. This sets the stage for layering in your other goodies.
- Layer Meats and Cheeses (8 minutes)
Alternate meats and cheeses in sections—think stripes or clusters. Place brie wedges in one corner, cheddar cubes in another, and fill gaps with prosciutto and salami. For extra drama, fold meats into rosettes or “ribbons.” If you’re aiming for a spooky vibe, stack darker cheeses near the corners and lighter ones in the center.
- Add Fruits, Nuts, and Extras (5 minutes)
Scatter grapes, dried figs, and apricots throughout the board. Tuck in bowls of olives and nuts. Fill small ramekins with honey or fig jam and nestle them into the corners. Rosemary sprigs work great for adding “creepy greenery”—just lay them along the edges.
- Decorate with Halloween Touches (3 minutes)
Add gummy worms, candy eyeballs, or edible flowers for fun. Place mozzarella balls with sliced olives on top to resemble eyeballs. Don’t go overboard—just a few accent pieces make the board pop.
- Final Touches & Serving (2 minutes)
Give everything a gentle wipe with a clean towel if needed. Set out cheese knives and picks. Snap a photo (because you’ll want to remember this coffin charcuterie board) and serve immediately. If you’re prepping ahead, cover loosely with plastic wrap and refrigerate up to 2 hours.
Pro tip: If anything looks crowded, just shift snacks around until it feels balanced. If cheese gets too soft, pop it back in the fridge for a few minutes. Trust your instincts—no two boards ever turn out exactly the same, and that’s part of the fun!
Cooking Tips & Techniques
After a few years of building coffin charcuterie boards, I’ve learned a thing or two (mostly from little mishaps!). Here are my favorite tricks for making your board look and taste its best:
- Keep Color Contrast in Mind: Mix light cheeses with dark meats. Black crackers next to orange cheddar really stand out.
- Don’t Overcrowd: Leave a little space between sections so each snack gets its moment. Cramming things together looks messy and makes grabbing items harder.
- Layering is Key: Stack meats and cheeses on top of crackers for height. Use bowls for jams and nuts to avoid sogginess.
- Chill Cheese Until Assembly: Soft cheeses get gooey if left out too long (learned the hard way). Slice just before building your board.
- Serve at Room Temperature: Cold meats and cheeses taste bland. Let your board sit out for 15–20 minutes before serving.
I once tried assembling everything the night before—bad idea. The crackers got soggy and the cheese dried out. Now I do all the slicing ahead, but assemble right before guests arrive. If you’re worried about time, group ingredients by type and keep them ready in containers. Multitasking helps—get a friend or family member to help with laying out snacks (it’s more fun anyway).
For extra consistency, I use the same basic layout every year, but switch up the details. If something falls out of place, just pop it back on—no stress. The best boards look a little wild anyway. You’ll find your groove after a couple tries, promise!
Variations & Adaptations
One of the best things about the coffin charcuterie board is how easy it is to customize. Here are a few fun ideas for different tastes and dietary needs:
- Vegetarian Version: Skip the meats and load up on roasted veggies, cheese, and nuts. Marinated mushrooms, grilled zucchini slices, and herbed goat cheese are crowd favorites.
- Vegan Option: Use plant-based cheeses and faux meats like vegan pepperoni. Add hummus, roasted chickpeas, and lots of fresh veggies. “Cheesy” cashew dip works great as a centerpiece.
- Gluten-Free Swap: Use almond flour crackers, rice cakes, or gluten-free breadsticks. Make sure any packaged meats are labeled gluten-free.
- Seasonal Twist: In autumn, swap in roasted pumpkin seeds, dried cranberries, and apple slices. For a springtime party, add fresh berries and edible flowers.
- Spicy Lovers’ Board: Add spicy chorizo, jalapeño jack cheese, and candied chili nuts. A little hot honey drizzled over cheddar is surprisingly delicious!
- Personal Favorite: Last year, I added chocolate-covered pretzels and spicy candied pecans. The sweet-and-savory combo was a hit with everyone, even the kids.
Don’t be afraid to experiment. Sometimes the best boards are improvised with whatever’s in the fridge. If you have guests with allergies, label ingredients or keep a “safe” section on the board. Little tweaks make a big difference!
Serving & Storage Suggestions
Serve the coffin charcuterie board at room temperature for the best flavors and textures. Put it in the center of your party table—trust me, everyone gravitates toward it. If you want to get fancy, lay out a black cloth or scatter Halloween confetti around the board.
Pair with spooky cocktails (think blackberry sangria or “bloody” mocktails), or offer sparkling water with fresh fruit. For a full spread, add a pumpkin soup or mini mummy hot dogs on the side.
If you have leftovers, transfer meats and cheeses to airtight containers and refrigerate up to 3 days. Crackers and breadsticks can go in zip bags. To reheat, let cheeses sit out to soften, and serve meats chilled or at room temperature. Flavors tend to meld overnight, so the board actually tastes even better the next day—just watch out for soggy items.
For freezing, stick to hard cheeses and nuts (soft cheeses don’t freeze well). If you want to prep ahead, slice everything and store separately, then assemble right before serving. That way, your coffin charcuterie board stays fresh and inviting.
Nutritional Information & Benefits
The coffin charcuterie board is all about balance. With a mix of protein-rich meats, calcium-packed cheeses, and fiber from fruits and nuts, it’s more than just a treat. Here’s a quick snapshot of what you’re nibbling:
- Estimated per serving (based on 8 servings):
- Calories: 350–400
- Protein: 15–20 g
- Carbs: 18–22 g
- Fat: 22–28 g
- Sodium: 450–650 mg
Cheeses offer calcium and protein, while nuts add healthy fats. Fruits bring antioxidants and natural sweetness. For gluten-free or low-carb diets, just swap out crackers and breadsticks. Watch out for allergens (dairy, nuts, gluten, and processed meats)—label items if needed. I love that this board can fit into almost any eating style, making it a guilt-free party pick.
Conclusion
If you’re ready to wow your guests and turn snack time into a Halloween event, this coffin charcuterie board is your ticket. It’s easy, fun, and endlessly customizable—you can make it spooky, silly, or downright gourmet. Every time I serve it, people ask for my “secret” (spoiler: it’s mostly about the presentation).
Try mixing up ingredients, adding your own favorite snacks, or letting kids help with the decorations. The best boards are the ones that feel personal and a little imperfect. Why do I love it? Because it brings people together, sparks laughter, and makes every Halloween party a little more magical.
Drop a comment below if you try this coffin charcuterie board, or share your own creative variations! Tag me on Pinterest or Instagram with your spooky spread—I can’t wait to see your edible masterpieces. Happy haunting, and happy snacking!
FAQs
How do I make a coffin-shaped board if I don’t own one?
Easy—just cut parchment paper into a coffin outline and place it on a large wooden board or baking tray. You can also use a Halloween-themed serving platter.
Can I prepare the coffin charcuterie board ahead of time?
Yes! Slice cheeses and meats beforehand, but assemble the board right before serving to keep everything fresh and crispy.
What are the best cheeses for this Halloween charcuterie board?
Brie, cheddar, goat cheese, and mozzarella balls are my go-tos. Mix soft and hard cheeses for variety and visual interest.
How do I make this board kid-friendly?
Include fun snacks like pretzels, fruit slices, and candy eyeballs. Skip spicy meats and strong cheeses for younger guests.
Can I make a vegetarian or vegan version?
Absolutely! Use plant-based cheeses, roasted veggies, and vegan deli slices. Hummus and nut dips are great additions too.
Pin This Recipe!


Coffin Charcuterie Board: Easy Halloween Party Appetizer Guide
- Total Time: 20 minutes
- Yield: 8 servings
Description
This visually striking coffin charcuterie board is a fun, customizable centerpiece for Halloween parties, featuring a mix of savory meats, cheeses, fruits, sweets, and spooky garnishes. Quick to assemble and easy to adapt for dietary needs, it’s guaranteed to impress guests of all ages.
Ingredients
- Coffin-shaped serving tray or large rectangular wooden board (lined with parchment cut into a coffin shape if needed)
- Salami slices (about 6 oz)
- Prosciutto (about 4 oz)
- Capicola or spicy cured meats (about 4 oz)
- Pepperoni rounds (about 6 oz)
- Brie or Camembert wheel (about 8 oz)
- Sharp cheddar, cubed or sliced (about 8 oz)
- Goat cheese log, rolled in black pepper or herbs (about 4 oz)
- Swiss or Gruyère, sliced (about 6 oz)
- Mini mozzarella balls (about 6 oz)
- Black sesame crackers or charcoal crackers (about 4 oz)
- Thin breadsticks (about 4 oz)
- Mini crostini or rye crisps (about 4 oz)
- Gluten-free crackers (optional, about 4 oz)
- Black grapes or Concord grapes (about 8 oz)
- Dried apricots or figs (about 4 oz)
- Fresh strawberries, halved (about 8 oz)
- Gummy worms or candy eyeballs (about 2 oz)
- Olives—black and green (about 6 oz)
- Roasted almonds or spicy nuts (about 4 oz)
- Honey or fig jam (about 2 oz)
- Fresh rosemary sprigs
- Edible flowers or microgreens (optional)
Instructions
- Lay out your coffin-shaped tray or line a rectangular board with parchment cut into a coffin shape. Make sure your workspace is clean, and gather all your ingredients nearby for easy access.
- Slice cheddar and Swiss into thin strips or cubes. Cut the brie into wedges. Arrange salami, prosciutto, and pepperoni in loose folds or small stacks. Set aside mozzarella balls for ‘eyeballs.’ Keep cheeses cold until just before assembly for clean cuts.
- Outline the coffin shape with breadsticks or crackers, stacking them vertically or horizontally to create crisp edges.
- Alternate meats and cheeses in sections—think stripes or clusters. Place brie wedges in one corner, cheddar cubes in another, and fill gaps with prosciutto and salami. Fold meats into rosettes or ribbons for extra drama. Stack darker cheeses near the corners and lighter ones in the center for a spooky vibe.
- Scatter grapes, dried figs, and apricots throughout the board. Tuck in bowls of olives and nuts. Fill small ramekins with honey or fig jam and nestle them into the corners. Lay rosemary sprigs along the edges for ‘creepy greenery.’
- Decorate with gummy worms, candy eyeballs, or edible flowers. Place mozzarella balls with sliced olives on top to resemble eyeballs. Use accent pieces sparingly for visual impact.
- Give everything a gentle wipe with a clean towel if needed. Set out cheese knives and picks. Snap a photo and serve immediately. If prepping ahead, cover loosely with plastic wrap and refrigerate up to 2 hours.
Notes
Customize the board for dietary needs by swapping meats for roasted veggies or plant-based options, and using gluten-free crackers. Assemble just before serving to keep crackers crisp and cheeses fresh. For extra flair, add edible flowers or seasonal fruits. Serve at room temperature for best flavor.
- Prep Time: 20 minutes
- Cook Time: 0 minutes
- Category: Appetizer
- Cuisine: American
Nutrition
- Serving Size: 1/8 of board
- Calories: 375
- Sugar: 8
- Sodium: 550
- Fat: 25
- Saturated Fat: 10
- Carbohydrates: 20
- Fiber: 3
- Protein: 17
Keywords: Halloween, charcuterie board, party appetizer, coffin board, spooky snacks, cheese board, meat and cheese platter, holiday entertaining, easy appetizer, Halloween party