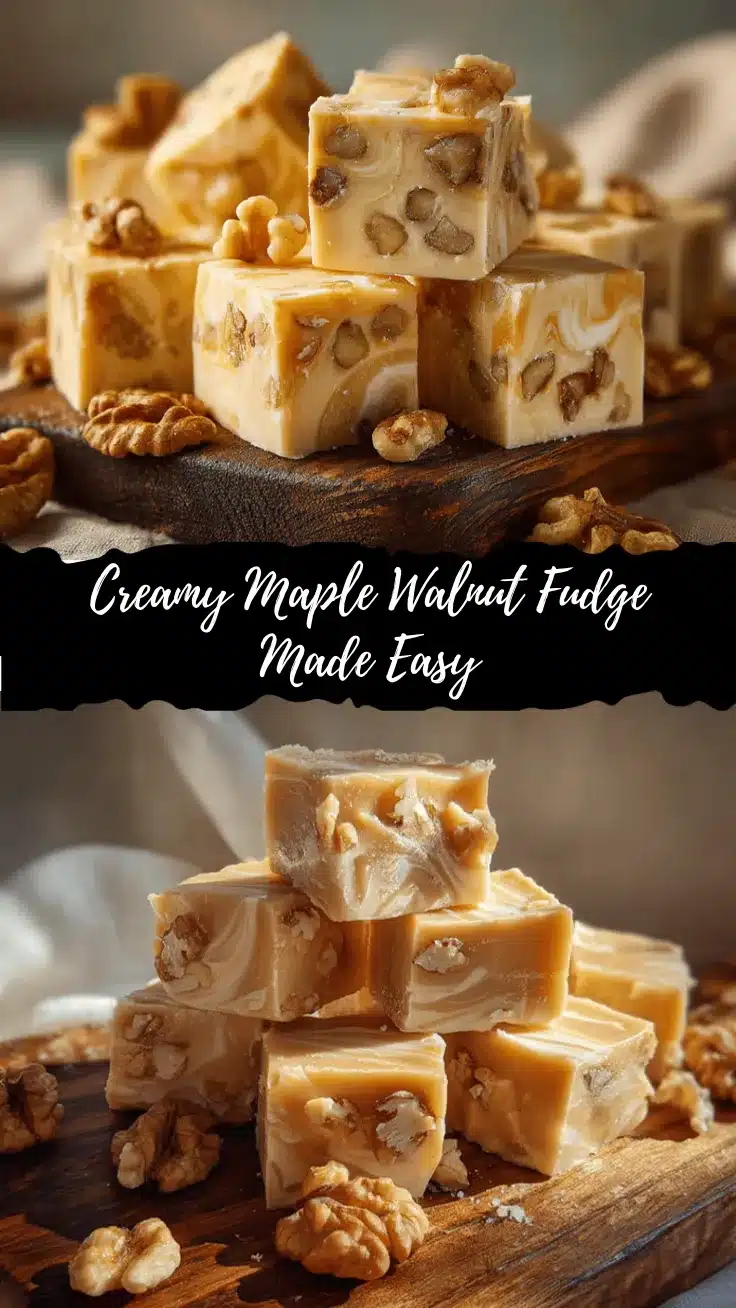
The first time I tasted creamy maple walnut fudge, it was at a tiny fall festival in Vermont—crisp leaves underfoot, the air thick with the scent of maple syrup. Honestly, nothing brings back that memory quite like this recipe. The flavor is pure nostalgia: sweet, buttery, and packed with crunchy walnuts. If you’re anything like me, that classic combo of maple and nuts just feels like autumn in a single bite.
Making homemade fudge always felt intimidating to me, but after a few trial runs (okay, and a couple of sticky messes), I found a way to get that dreamy, melt-in-your-mouth texture every time. This creamy maple walnut fudge is now my go-to for cozy gatherings, hostess gifts, or just when I need a pick-me-up treat. It’s easy enough for beginners but impressive enough for foodies—plus, it fills your kitchen with that warm maple smell that could make anyone swoon.
If you’ve ever craved old-fashioned fudge but wanted something a little special, this recipe is for you. I’ve tested different maple syrups, experimented with nut ratios, and even tried dairy-free swaps. Trust me, the results are always fantastic. Whether you’re baking with kids, prepping for a bake sale, or just indulging in a sweet tooth moment, creamy maple walnut fudge is guaranteed to please.
Let’s face it—some days, you just want a treat that’s simple, satisfying, and a little bit fancy. This fudge checks all the boxes, and I can’t wait to share my tips and tricks to make your batch absolutely irresistible.
Why You’ll Love This Creamy Maple Walnut Fudge Recipe
After years of testing fudge recipes (and eating way too many samples!), I’ve learned what makes a truly unforgettable maple walnut fudge. This recipe is packed with flavor and foolproof techniques, so you get perfect results every time. Here’s why you’ll want to make it again and again:
- Quick & Easy: Ready in under 30 minutes, with most of the work done in just one pot. Perfect for spontaneous sweets or last-minute party prep.
- Simple Ingredients: No obscure stuff—just maple syrup, butter, sugar, cream, and walnuts. You probably have most of it in your pantry already!
- Perfect for Fall Gatherings: It’s a classic autumn treat, ideal for Thanksgiving dessert tables, Halloween parties, or gifting to neighbors.
- Crowd-Pleaser: Kids love the sweetness, adults rave about the maple flavor and crunch. I have yet to meet someone who doesn’t ask for seconds.
- Unbelievably Delicious: The texture is creamy and smooth, with crunchy chunks of walnut in every bite. It’s the kind of fudge you close your eyes for, just to savor the flavor.
This recipe stands out because it uses real maple syrup—not just flavoring—so you get that deep, authentic taste. I blend the syrup with heavy cream for a rich base, and toast the walnuts for extra nuttiness. There’s no grainy sugar, no weird aftertaste, just pure homemade goodness.
Making fudge at home can feel like a project, but with my step-by-step method and personal tips, you’ll be confident from start to finish. I’ve walked friends through this recipe over video chat, and even my nephew (who’s never baked before) nailed it. Whether you’re making gifts, prepping holiday trays, or just treating yourself, this creamy maple walnut fudge is always a hit.
What Ingredients You Will Need
This creamy maple walnut fudge recipe uses wholesome, tried-and-true ingredients. Each one plays a role in building flavor, texture, and that irresistible maple-walnut combo. The best part? You can swap a few things around if needed—no specialty shopping trips required.
- Pure Maple Syrup (dark or amber, 1 cup / 240 ml) – For true maple flavor. I recommend using Grade A Dark for a robust taste.
- Granulated Sugar (1 cup / 200 g) – Adds sweetness and helps with fudge structure.
- Heavy Cream (¾ cup / 180 ml) – Creates a smooth, creamy texture. You can use coconut cream for a dairy-free version.
- Unsalted Butter (½ cup / 115 g, cut into pieces) – Adds richness and silkiness. If you only have salted butter, just reduce added salt.
- Chopped Walnuts (1 cup / 120 g, toasted for best flavor) – Brings crunch and a nutty balance to the sweetness. I always toast mine in a dry skillet for a few minutes first.
- Vanilla Extract (1 tsp / 5 ml) – Enhances the maple and rounds out the flavors.
- Salt (¼ tsp / 1 g) – Just a pinch, to heighten all the flavors.
- Powdered Sugar (2 cups / 240 g, sifted) – For a smooth finish and creamy consistency.
Optional Add-ins:
- Maple Extract (¼ tsp / 1 ml) – For extra maple punch, especially if your syrup is mild.
- Mini Chocolate Chips (½ cup / 90 g) – Fold in for a fun twist.
- Dried Cranberries (½ cup / 60 g) – For a seasonal, tart contrast.
Ingredient Tips: If you’re out of heavy cream, half-and-half works in a pinch (the fudge will be slightly firmer). For walnuts, I like to buy raw halves and chop them myself—less dust, more crunch. Sifting powdered sugar is worth the extra step (no lumps in your fudge!).
You can swap walnuts for pecans if that’s your thing, or leave out nuts entirely for a pure maple version. I’ve even made this with vegan butter and coconut cream for friends with dairy allergies—it’s still dreamy.
Equipment Needed
You don’t need fancy gear for creamy maple walnut fudge, but a few reliable tools make things much easier. Here’s what I use every time:
- Medium Saucepan (heavy-bottomed) – Prevents burning and keeps the heat even. My old stainless steel pot works great.
- Wooden Spoon or Heatproof Spatula – For stirring. I prefer a silicone spatula so I can scrape the sides clean.
- Candy Thermometer – Optional, but super helpful for hitting the right temperature (soft-ball stage, about 235°F / 113°C). I’ve made fudge without it, but it’s riskier.
- 8×8-inch (20×20 cm) Baking Pan – For setting the fudge. You can use a loaf pan for thicker pieces.
- Parchment Paper or Nonstick Foil – Makes removing the fudge a breeze.
- Mixing Bowl – For combining fudge and powdered sugar.
- Whisk – To smooth out any lumps if needed.
If you don’t have a candy thermometer, use the “soft-ball” water test (drop a bit of syrup into cold water—it should form a soft ball). For budget-friendly options, I started out with thrift store pans and spoons; as long as they’re sturdy, you’re set. Just wash your saucepan right away—fudge can stick!
Preparation Method
Ready to make creamy maple walnut fudge? Here’s my step-by-step method. I’ve included time estimates, sensory cues, and troubleshooting tips so you’re set up for success.
- Prep your pan. Line an 8×8-inch (20×20 cm) baking pan with parchment paper, leaving an overhang for easy removal. Lightly butter the sides. Set aside—takes 2 minutes.
- Toast the walnuts. In a dry skillet over medium heat, toast chopped walnuts for 3-4 minutes until fragrant. Stir often to avoid burning. Transfer to a plate to cool.
- Combine maple syrup, sugar, cream, and butter. In your saucepan, add 1 cup maple syrup, 1 cup granulated sugar, ¾ cup heavy cream, and ½ cup unsalted butter. Heat over medium, stirring gently as the butter melts—about 3 minutes.
- Cook the mixture. Bring to a gentle boil, stirring constantly. Attach your candy thermometer or prepare for the soft-ball test. Continue cooking until the thermometer reads 235°F (113°C), about 8-10 minutes. The mixture will bubble and thicken. If you don’t have a thermometer, drop a bit into cold water—it should form a soft, squishy ball.
- Remove from heat and cool slightly. Take the pan off the burner. Let it cool for 2-3 minutes, then stir in 1 tsp vanilla extract and ¼ tsp salt. The aroma is incredible here—warm, sweet, and nutty.
- Beat in powdered sugar. Transfer the hot syrup to a mixing bowl. Add 2 cups sifted powdered sugar, whisking until smooth and creamy. The fudge will start to thicken—keep mixing until glossy and no lumps remain. If it seems too stiff, add a teaspoon of cream.
- Fold in walnuts. Gently stir in the toasted walnuts (and any optional add-ins like chocolate chips or cranberries). You want them evenly distributed.
- Pour and set. Spread the fudge into your prepared pan, smoothing the top with a spatula. It will start to firm up quickly, so work fast. Tap the pan gently on the counter to release air bubbles.
- Cool and cut. Let the fudge set at room temperature for 2-3 hours, or refrigerate for faster results (about 1 hour). When firm, lift out using the parchment and cut into squares.
Troubleshooting notes: If your fudge is grainy, it probably cooked too long or wasn’t stirred enough. For sticky fudge, chill longer or add a bit more powdered sugar. If it’s too sweet, try using less sugar next time or a darker maple syrup for more depth. (Trust me—I’ve made all the mistakes, but they’re easy to fix!)
Efficiency tip: Measure everything before you start—you’ll move faster and avoid burning. Clean your pan right after pouring; stuck-on fudge is no fun!
Cooking Tips & Techniques
After making creamy maple walnut fudge a dozen times (and learning the hard way), I’ve gathered a few pro tips to guarantee fudge success every batch.
- Use real maple syrup. The flavor is so much better than imitation. Dark or amber syrup gives a richer taste.
- Don’t skip the thermometer. It’s tempting, but hitting the right temperature (soft-ball stage, 235°F / 113°C) makes all the difference in texture.
- Stir constantly. Sugar can scorch quickly, especially as the syrup thickens. A silicone spatula lets you scrape the sides and bottom easily.
- Cool briefly before beating. Letting the syrup sit for 2-3 minutes after cooking helps prevent melted powdered sugar lumps and gives fudge that creamy texture.
- Toast your walnuts. It takes 3 minutes and adds so much flavor. Skip this step only if short on time.
- Work quickly when pouring. Fudge sets fast once you add powdered sugar—spread it and tap the pan quickly for a smooth finish.
- Troubleshooting grainy fudge: I once overcooked a batch and it turned gritty. If this happens, add a tablespoon of cream and beat again until smooth.
- Multitasking tip: Toast nuts while the syrup heats up. Clean up as you go so you’re not left with sticky pans at the end.
If you make fudge often, invest in a sturdy thermometer (I’ve gone through a few cheap ones that didn’t last). And honestly, don’t fret about perfection—sometimes a slightly uneven batch tastes even better!
Variations & Adaptations
One of the joys of homemade fudge is how easily you can make it your own. Here are a few tasty variations I’ve tried or recommend:
- Dairy-Free Maple Walnut Fudge: Swap the heavy cream for coconut cream and use vegan butter. The texture stays creamy, and the maple flavor shines through.
- Chocolate Maple Walnut Fudge: Stir in ½ cup (90 g) mini chocolate chips or swirl melted chocolate over the top before setting. It’s a hit with kids!
- Pecan Maple Fudge: Trade walnuts for pecans or a mix of both. Pecans add a softer crunch and a slightly different nutty note.
- Seasonal Add-ins: Dried cranberries, cherries, or even a sprinkle of cinnamon on top for holiday flair.
- Nut-Free Option: Leave out the walnuts for pure maple fudge, or add toasted pumpkin seeds for crunch.
- Low-Sugar Adaptation: Use a sugar substitute like coconut sugar or monk fruit—it won’t be identical, but still delicious.
Personally, I love adding a pinch of flaky sea salt on top before the fudge sets. It balances the sweetness and looks gorgeous. If you’re gifting fudge, mix up a couple of variations for a beautiful assortment box.
Serving & Storage Suggestions
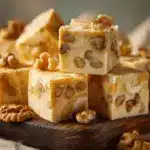
Creamy maple walnut fudge is best served at room temperature, when it’s soft but holds its shape. I love piling the cubes onto a rustic wooden board for parties, or wrapping squares in wax paper for gift bags.
- Serving: Cut into 1-inch (2.5 cm) squares for bite-sized treats. Pair with hot coffee, spiced tea, or even apple cider for a cozy fall snack.
- Presentation: Sprinkle extra toasted walnuts or a dusting of powdered sugar for a pretty finish. Fudge looks gorgeous in a tin lined with parchment.
- Storage: Keep in an airtight container at room temperature for up to 1 week. For longer storage, refrigerate (up to 2 weeks) or freeze (up to 2 months). Layer with parchment to prevent sticking.
- Reheating: If fridge-fresh fudge seems too firm, let it sit at room temp for 15-20 minutes before serving. Don’t microwave—it can melt unevenly.
- Flavor notes: The maple aroma intensifies after a day or two—honestly, leftovers taste even better!
If you’re prepping for a party, make fudge a day ahead so it fully sets and flavors meld. For gifting, wrap pieces individually in wax paper or pop them into small boxes with a ribbon. Homemade fudge is always a welcome treat!
Nutritional Information & Benefits
Here’s an estimate for each square (based on 36 squares per batch):
- Calories: About 90
- Fat: 6 g (mostly from walnuts and butter)
- Sugar: 10 g
- Protein: 1 g
- Carbohydrates: 12 g
Walnuts add healthy fats, omega-3s, and a bit of protein, while maple syrup brings minerals like manganese and zinc. This fudge is naturally gluten-free (just check your powdered sugar for additives). For dairy-free diets, use coconut cream and vegan butter as mentioned above.
Potential allergens include dairy and nuts—so if you’re serving a crowd, label accordingly. I love this fudge for the energy boost and heart-healthy nuts. It’s definitely an indulgence, but one with some redeeming qualities!
Conclusion
Creamy maple walnut fudge is more than just a sweet treat—it’s a celebration of fall flavors, cozy afternoons, and simple pleasures. Whether you’re making it for friends, sharing at a holiday table, or sneaking a piece with your morning coffee, it’s the kind of recipe that brings smiles all around.
Customize the fudge with your favorite nuts, add-ins, or even a splash of chocolate. The process is easy, forgiving, and always fun. I keep coming back to this recipe not just for the taste, but for the memories it helps create.
If you give this creamy maple walnut fudge recipe a try, I’d love to hear how it turned out! Leave a comment, share your photos, or let me know your favorite twists. Homemade fudge is meant to be shared—so spread the sweetness!
Happy baking, and here’s to irresistible homemade treats!
FAQs
Can I make creamy maple walnut fudge without a candy thermometer?
Yes, you can! Use the soft-ball water test: drop a bit of hot syrup into cold water, and if it forms a soft ball that you can squish but holds its shape, it’s ready.
How do I keep my fudge from getting grainy?
Stir constantly while cooking and use a candy thermometer for accuracy. If it becomes grainy, beat in a tablespoon of cream or try reheating gently and mixing again.
Can I use other nuts instead of walnuts?
Absolutely! Pecans, almonds, or hazelnuts all work. The texture and flavor will change slightly, but it’s still delicious.
Is maple extract necessary if I’m using real maple syrup?
Nope! Real maple syrup provides plenty of flavor. Maple extract is only needed if you want a bigger punch or are using a mild syrup.
How long does homemade fudge last?
Stored in an airtight container at room temperature, fudge lasts up to 1 week. In the fridge, up to 2 weeks. You can also freeze it for up to 2 months—just thaw before serving.
Pin This Recipe!
Creamy Maple Walnut Fudge
- Total Time: 25 minutes (plus 1-3 hours to set)
- Yield: 36 squares 1x
Description
This creamy maple walnut fudge is a nostalgic, melt-in-your-mouth treat packed with real maple syrup and crunchy toasted walnuts. Quick and easy to make, it’s perfect for fall gatherings, gifting, or satisfying your sweet tooth.
Ingredients
- 1 cup pure maple syrup (dark or amber)
- 1 cup granulated sugar
- 3/4 cup heavy cream (or coconut cream for dairy-free)
- 1/2 cup unsalted butter, cut into pieces
- 1 cup chopped walnuts, toasted
- 1 teaspoon vanilla extract
- 1/4 teaspoon salt
- 2 cups powdered sugar, sifted
- Optional: 1/4 teaspoon maple extract
- Optional: 1/2 cup mini chocolate chips
- Optional: 1/2 cup dried cranberries
Instructions
- Line an 8×8-inch baking pan with parchment paper, leaving an overhang for easy removal. Lightly butter the sides.
- Toast chopped walnuts in a dry skillet over medium heat for 3-4 minutes until fragrant. Transfer to a plate to cool.
- In a medium saucepan, combine maple syrup, granulated sugar, heavy cream, and butter. Heat over medium, stirring gently as the butter melts (about 3 minutes).
- Bring the mixture to a gentle boil, stirring constantly. Attach a candy thermometer or prepare for the soft-ball test. Cook until the thermometer reads 235°F (113°C), about 8-10 minutes.
- Remove from heat and let cool for 2-3 minutes. Stir in vanilla extract and salt.
- Transfer the hot syrup to a mixing bowl. Add sifted powdered sugar, whisking until smooth and creamy. If too stiff, add a teaspoon of cream.
- Fold in toasted walnuts and any optional add-ins (chocolate chips, cranberries).
- Spread the fudge into the prepared pan, smoothing the top with a spatula. Tap the pan gently to release air bubbles.
- Let the fudge set at room temperature for 2-3 hours, or refrigerate for about 1 hour. When firm, lift out using the parchment and cut into squares.
Notes
Use real maple syrup for best flavor. Toasting walnuts adds extra nuttiness. If you don’t have a candy thermometer, use the soft-ball water test. For dairy-free, substitute coconut cream and vegan butter. Fudge sets quickly after adding powdered sugar, so work fast. Store in an airtight container at room temperature for up to 1 week, or refrigerate/freeze for longer storage.
- Prep Time: 10 minutes
- Cook Time: 15 minutes
- Category: Dessert
- Cuisine: American
Nutrition
- Serving Size: 1 square (about 1-inch)
- Calories: 90
- Sugar: 10
- Sodium: 25
- Fat: 6
- Saturated Fat: 3
- Carbohydrates: 12
- Fiber: 0.5
- Protein: 1
Keywords: maple walnut fudge, creamy fudge, fall dessert, homemade fudge, maple syrup, easy fudge recipe, autumn sweets, nutty fudge, gluten-free fudge, holiday treats