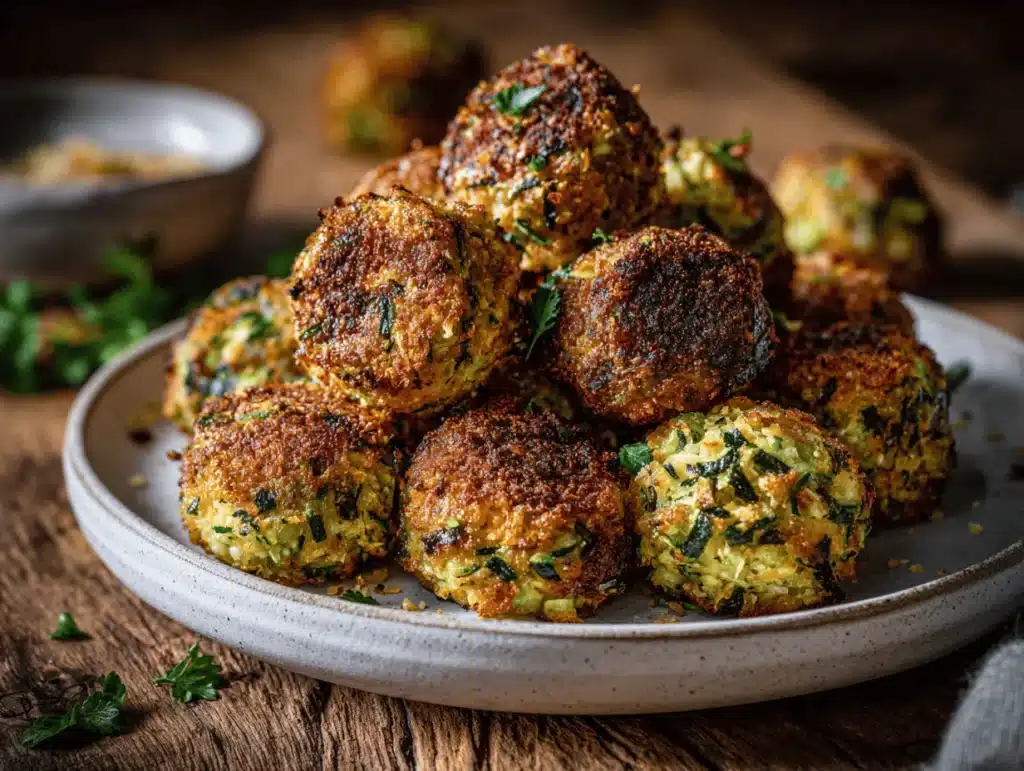
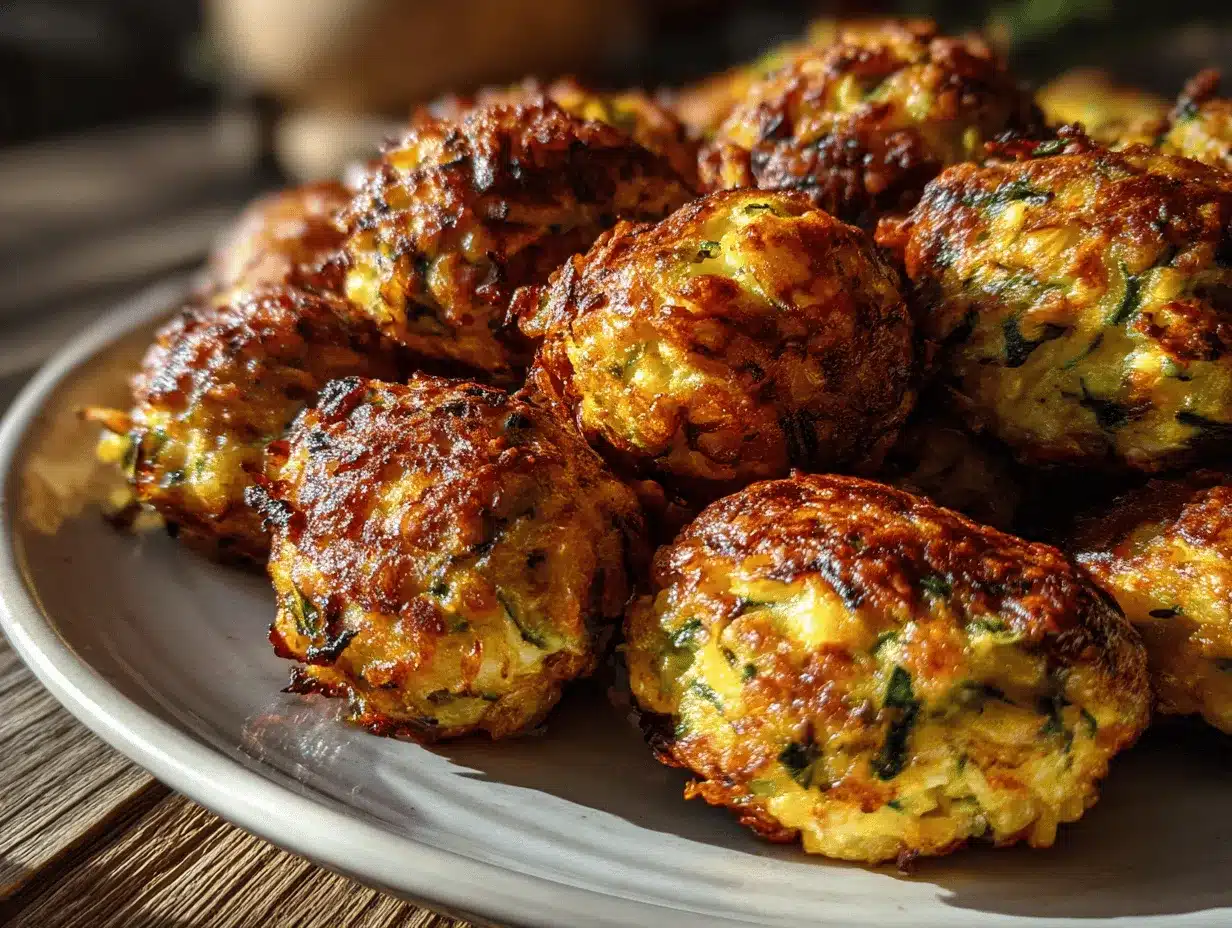
Steam rising from a golden tray of crispy garlic zucchini balls—now that’s the kind of snack that makes you stop in your tracks. The first time I tried these, my kitchen smelled absolutely incredible (think rich garlic, fresh herbs, and a hint of toasted breadcrumbs). Honestly, I stumbled upon this recipe on a rainy afternoon, desperately searching for something to do with the mound of zucchini my neighbor dropped off. Little did I know, I’d be making these irresistible veggie bites for every party, picnic, and lazy Sunday ever since.
There’s just something magical about zucchini when you pair it with garlic and a crunchy crust. It’s like a little green surprise in every bite! If you’re anything like me, you’ve probably faced the classic “what do I do with all this zucchini?” dilemma—especially when summer gardens go wild. These crispy garlic zucchini balls are my go-to solution. They’re quick, simple, and can transform ordinary veggies into the ultimate snack. And let’s face it: they’re way more fun than regular fritters or boring roasted veggies.
I’ve tested this recipe a dozen times (okay, maybe more), tweaking the seasoning, changing up the breading, and even sneaking in extra cheese now and then. As a longtime home cook and veggie enthusiast, I can honestly say these balls are foolproof. Whether you’re cooking for picky kids, health-conscious friends, or just yourself, the crispy garlic zucchini balls check all the boxes. They’re packed with flavor, rich in texture, and surprisingly nutritious. Plus, they’re perfect for meal prep, snacking, or even as a light dinner. Let me show you why these little bites deserve a permanent spot in your recipe collection.
Why You’ll Love This Recipe
- Quick & Easy: Ready in under 40 minutes. You don’t need fancy gadgets or hours to make these crispy garlic zucchini balls!
- Simple Ingredients: Everything’s pretty much pantry basics—zucchini, breadcrumbs, garlic, cheese, and eggs. No weird stuff.
- Perfect for Any Occasion: They’re the kind of snack that fits right in at brunch, game night, or just as a side dish for lunch.
- Crowd-Pleaser: Adults love the flavor, and kids love the fun shape and that crunchy exterior. Honestly, everyone grabs seconds.
- Unbelievably Delicious: The garlic and cheese give these zucchini balls a savory punch, while the crispy shell keeps every bite satisfying.
What sets these crispy garlic zucchini balls apart from your average veggie fritter? First off, I use a blend of fresh and dried herbs to amp up the flavor. The trick is squeezing out extra moisture from the zucchini—this makes the balls hold together and stay ultra-crispy. Blending in a touch of Parmesan (or your favorite hard cheese) adds depth and helps the outside get that perfect golden crunch.
I’ve made dozens of versions—pan-fried, baked, even air-fried. Each method brings its own charm, but the classic oven-baked version is my favorite for that consistent crunch and less mess. Whether you’re looking for a healthy snack, a creative side, or just a way to make veggies fun, these crispy garlic zucchini balls never disappoint. I promise, it’s the kind of comfort food you’ll crave when you want something simple yet totally satisfying.
They’re also a lifesaver when you need to impress guests but don’t want to stress in the kitchen. I’ve served them at casual get-togethers and fancy dinners alike—always a hit! So, if you’re ready to fall in love with zucchini all over again, keep reading. This recipe is about to become your new favorite.
Ingredients Needed
This recipe uses simple, wholesome ingredients to deliver bold flavor and a satisfying texture without any fuss. Most items are probably already tucked away in your fridge or pantry (I know mine usually are!). Here’s what you’ll need:
- For the zucchini mixture:
- 2 medium zucchini (about 400g), grated
- 1 teaspoon salt (for drawing out moisture)
- 2 large eggs, lightly beaten (room temperature works best)
- 3 garlic cloves, minced (for that signature kick)
- 1/2 cup (50g) grated Parmesan cheese (adds richness and flavor)
- 1/4 cup (30g) shredded mozzarella (optional, for gooey texture)
- 1/4 cup (30g) finely chopped fresh parsley (or basil—whatever you have on hand)
- 1/2 teaspoon dried oregano (for an herby touch)
- 1/4 teaspoon black pepper
- For the coating:
- 1 cup (80g) panko breadcrumbs (extra crispy! Regular works too)
- 1/2 cup (40g) regular breadcrumbs (help with structure)
- 1/2 teaspoon garlic powder (for even more flavor)
- Cooking spray or 2 tablespoons olive oil (for baking)
- Optional add-ins or swaps:
- Swap Parmesan for Pecorino Romano or a vegan cheese (for dairy-free)
- Use gluten-free panko if needed (I like [brand] for texture)
- Add a pinch of chili flakes for a spicy kick
- Substitute parsley with cilantro or dill for a fresh twist
- Replace eggs with flax eggs for vegan adaptation (1 tablespoon ground flax + 2.5 tablespoons water per egg)
I always recommend squeezing the zucchini as much as possible—trust me, it makes all the difference. If your zucchini’s extra watery (it happens, especially in summer), just add a tablespoon or two more breadcrumbs. Fresh herbs are lovely, but dried work in a pinch. And don’t worry about being too precise—these crispy garlic zucchini balls are forgiving!
Equipment Needed
- Box grater or food processor: For quick, even zucchini shredding. I’ve used both—grater is perfect for small batches, food processor for a crowd.
- Mixing bowls: At least two—one for the zucchini, one for the coating. Stainless steel or glass works best.
- Fine mesh strainer or cheesecloth: To squeeze out excess water from zucchini. A clean kitchen towel works too (just gets a bit messy).
- Baking sheet: Standard size (about 13×18-inch/33x46cm) lined with parchment paper for easy cleanup.
- Wire rack (optional): Helps the balls crisp up evenly while cooling.
- Measuring cups and spoons: For accuracy—though a pinch extra cheese never hurt anyone!
- Small scoop or tablespoon: For shaping uniform balls. I use an ice cream scoop for speed.
If you don’t have a mesh strainer, a regular colander and your hands work fine. For baking sheets, any nonstick tray will do. And if you’re on a budget, don’t sweat the fancy tools—these zucchini balls are pretty forgiving. Just be sure to keep your grater sharp and your mixing bowls deep. Maintenance tip: rinse your grater right away to avoid stuck-on zucchini bits (learned that one the hard way).
Preparation Method
- Prep the zucchini: Grate 2 medium zucchini (about 400g) using a box grater or food processor. Sprinkle with 1 teaspoon salt and let sit in a bowl for 10 minutes. This helps draw out moisture. While you wait, preheat oven to 400°F (200°C) and line a baking sheet with parchment paper.
- Squeeze out the water: Transfer salted zucchini to a fine mesh strainer, cheesecloth, or clean kitchen towel. Squeeze and twist until most liquid is removed—you want the shreds dry but not bone-dry. Excess moisture makes the balls soggy.
- Mix the base: In a large bowl, combine the squeezed zucchini, 2 beaten eggs, 3 minced garlic cloves, 1/2 cup (50g) Parmesan, 1/4 cup (30g) mozzarella (if using), 1/4 cup (30g) chopped parsley, 1/2 teaspoon dried oregano, and 1/4 teaspoon pepper. Stir until evenly combined. If mixture seems very wet, add 1-2 tablespoons breadcrumbs.
- Prepare the coating: In a separate bowl, mix 1 cup (80g) panko, 1/2 cup (40g) regular breadcrumbs, and 1/2 teaspoon garlic powder.
- Shape the balls: Use a small scoop or tablespoon to portion out the zucchini mixture. Roll each into a ball (about 1.5-inch/4cm diameter). You should get 18-22 balls, depending on size.
- Coat the balls: Roll each ball in the breadcrumb mixture, pressing gently to coat all sides. Place on the lined baking sheet, spacing them apart so they don’t touch.
- Bake: Spray balls lightly with cooking spray or drizzle with olive oil. Bake for 20-25 minutes, turning halfway, until golden brown and crispy. They should smell garlicky and look deeply golden; if not, give them a few more minutes.
- Cool and serve: Let the balls cool for 5 minutes on a wire rack (if you have one). This helps them crisp up even more. Serve warm for best texture.
Troubleshooting: If balls seem too wet and don’t hold together, add more breadcrumbs or cheese. If coating falls off, gently press breadcrumbs on before baking. And don’t skip the cooling step—it really does make the crust crispier!
Personal tip: I sometimes prep the zucchini mixture a day ahead and keep it in the fridge. On busy nights, shaping and baking takes just 20 minutes. Also, don’t rush the squeezing—it’s the secret to perfect, crispy garlic zucchini balls every single time.
Cooking Tips & Techniques
Here’s where experience really comes into play. The crispy garlic zucchini balls can be ultra-crunchy or a little mushy depending on how you prep them—so let’s nail the technique.
- Squeeze hard! I once skipped squeezing the zucchini and ended up with soggy, flat balls. Don’t make my mistake—get every drop of water out.
- Uniform size: Keeping the balls the same size helps them cook evenly. Use a scoop or tablespoon, and don’t make them too big (smaller balls get crispier).
- Coating matters: Using a mix of panko and regular breadcrumbs gives a crunchy exterior and a sturdy structure. If you use only panko, the balls can crumble easily. Too fine, and they get dense.
- Don’t overcrowd: Give each ball space on the baking sheet. Crowding leads to steaming, which means less crunch.
- Turn halfway: Use tongs or a spatula to gently flip the balls at the halfway mark for even browning. I’ve forgotten this before—one side always ends up paler.
- Bake or air-fry: For extra crunch, you can air-fry at 375°F (190°C) for 15-18 minutes. They crisp up beautifully.
- Chill the mixture: If you have time, chill the zucchini mixture for 30 minutes before shaping. It firms up and holds together better.
Honestly, my first batch was a bit of a mess—too wet, too soft. But with these tricks, every batch since has come out with a perfect, crispy shell and a tender, flavorful center. Multitasking tip: while the balls bake, whip up a dipping sauce or toss together a salad. That way, dinner comes together in a snap!
Variations & Adaptations
Here’s the fun part—these crispy garlic zucchini balls are endlessly customizable. I’ve tried dozens of twists, and each one brings something new to the table.
- Gluten-Free: Use gluten-free panko and breadcrumbs. The texture stays crunchy (I like [brand] best).
- Vegan: Swap eggs for flax eggs (1 tablespoon ground flax + 2.5 tablespoons water per egg), and use vegan cheese.
- Spicy Kick: Add 1/2 teaspoon chili flakes or a pinch of cayenne to the zucchini mixture.
- Cheesy Variation: Double the mozzarella for extra gooey centers—kids love this one!
- Seasonal Adaptation: In fall, add grated carrots or sweet potato to the mix. In summer, toss in fresh dill or chives.
- Flavor Customization: Try Italian seasoning, smoked paprika, or lemon zest for a totally new profile.
- Air-Fryer Method: Air-fry at 375°F (190°C) for 15-18 minutes, shaking halfway.
I once added feta and mint for a Mediterranean twist—so good with a yogurt dip! For allergies, just skip the cheese or use a dairy-free alternative. These crispy garlic zucchini balls are honestly perfect for experimenting.
Serving & Storage Suggestions
Serve these crispy garlic zucchini balls piping hot, straight from the oven. They’re best enjoyed while the outside is crunchy and the inside is soft. I like to pile them onto a platter with a tangy yogurt dip, spicy marinara, or even classic ranch.
They pair well with fresh salads, grilled meats, or as part of a vegetarian spread. For brunch, I serve them alongside scrambled eggs and fresh fruit. At parties, they disappear fast—so double the batch if you’ve got a crowd!
For storage, cool the balls completely, then store in an airtight container in the refrigerator for up to 4 days. Freeze for longer storage (up to 2 months): lay them in a single layer on a tray, freeze until firm, then transfer to a freezer bag. To reheat, bake in a 375°F (190°C) oven for 8-10 minutes, or air-fry for 4-5 minutes until crisp again. The flavors deepen overnight, making leftovers even tastier!
Nutritional Information & Benefits
Each serving (about 4 balls) delivers around 110 calories, 4g protein, 6g fat, and 10g carbs. Zucchini is low in calories but high in vitamin C, potassium, and antioxidants. Garlic adds anti-inflammatory properties, while the cheese provides a dose of calcium and protein.
Great for gluten-free or low-carb diets, especially if you swap breadcrumbs for almond flour. Allergens include egg, dairy, and wheat—see adaptation section for swaps. Personally, I love these crispy garlic zucchini balls as a guilt-free snack that fits into my healthy eating routine (but doesn’t taste “healthy” in the boring way).
Conclusion
So there you have it—crispy garlic zucchini balls that are easy, flavorful, and endlessly adaptable. Whether you’re a lifelong veggie lover or just trying to sneak more greens onto your plate, these bites are worth a try. They’re quick enough for weeknights, impressive for parties, and comforting enough for lazy weekends.
Don’t be afraid to play with the flavors or swap out ingredients based on what you have. I make these at least twice a month, and every batch feels a little different (in the best way). Honestly, I love these because they remind me that simple food can be absolutely amazing.
If you give this recipe a go, drop a comment below, share your twists, or tag your photos online. I’d love to see your crispy garlic zucchini balls—let’s make veggies fun, one bite at a time!
FAQs
Can I make crispy garlic zucchini balls ahead of time?
Absolutely! Prepare the mixture and shape the balls, then refrigerate up to 24 hours before baking. Bake fresh for best texture.
What’s the best dip for these veggie bites?
They pair well with tzatziki, ranch, spicy marinara, or even a simple garlic yogurt sauce.
Can I fry instead of bake these zucchini balls?
Yes! Fry in shallow oil over medium heat until golden, about 3-4 minutes per side. They’ll be even crispier but a bit richer.
How do I keep them from getting soggy?
Squeeze the zucchini well and don’t overcrowd the baking sheet. Cooling on a wire rack helps maintain crunch.
Are these suitable for freezing?
Definitely. Freeze baked balls in a single layer, then transfer to a bag. Reheat in oven or air-fryer for best results—they’ll taste fresh and crunchy every time!
Pin This Recipe!


Crispy Garlic Zucchini Balls
- Total Time: 40 minutes
- Yield: 18-22 balls (about 4-5 servings) 1x
Description
These crispy garlic zucchini balls are a quick and easy veggie snack, packed with flavor from fresh herbs, garlic, and cheese, all wrapped in a crunchy breadcrumb coating. Perfect for parties, meal prep, or a healthy side, they’re endlessly adaptable and always a crowd-pleaser.
Ingredients
- 2 medium zucchini (about 14 oz), grated
- 1 teaspoon salt
- 2 large eggs, lightly beaten
- 3 garlic cloves, minced
- 1/2 cup grated Parmesan cheese
- 1/4 cup shredded mozzarella (optional)
- 1/4 cup finely chopped fresh parsley (or basil)
- 1/2 teaspoon dried oregano
- 1/4 teaspoon black pepper
- 1 cup panko breadcrumbs
- 1/2 cup regular breadcrumbs
- 1/2 teaspoon garlic powder
- Cooking spray or 2 tablespoons olive oil
- Optional: chili flakes, cilantro or dill, vegan cheese, gluten-free panko, flax eggs (1 tbsp ground flax + 2.5 tbsp water per egg)
Instructions
- Grate zucchini using a box grater or food processor. Sprinkle with salt and let sit for 10 minutes.
- Preheat oven to 400°F (200°C) and line a baking sheet with parchment paper.
- Transfer salted zucchini to a fine mesh strainer, cheesecloth, or kitchen towel. Squeeze out as much liquid as possible.
- In a large bowl, combine squeezed zucchini, eggs, garlic, Parmesan, mozzarella (if using), parsley, oregano, and pepper. Stir until evenly combined. If mixture is very wet, add 1-2 tablespoons breadcrumbs.
- In a separate bowl, mix panko, regular breadcrumbs, and garlic powder.
- Use a small scoop or tablespoon to portion out the zucchini mixture. Roll each into a ball (about 1.5-inch diameter).
- Roll each ball in the breadcrumb mixture, pressing gently to coat all sides. Place on the lined baking sheet, spaced apart.
- Spray balls lightly with cooking spray or drizzle with olive oil.
- Bake for 20-25 minutes, turning halfway, until golden brown and crispy.
- Let cool for 5 minutes on a wire rack before serving.
Notes
Squeeze zucchini thoroughly for best texture. For gluten-free, use GF breadcrumbs. For vegan, use flax eggs and vegan cheese. Air-fryer method: 375°F for 15-18 minutes. Chill mixture before shaping for firmer balls. Serve with yogurt dip, marinara, or ranch. Freeze leftovers and reheat in oven or air-fryer.
- Prep Time: 15 minutes
- Cook Time: 25 minutes
- Category: Snack
- Cuisine: American
Nutrition
- Serving Size: About 4 balls
- Calories: 110
- Sugar: 2
- Sodium: 350
- Fat: 6
- Saturated Fat: 2
- Carbohydrates: 10
- Fiber: 2
- Protein: 4
Keywords: zucchini balls, veggie snack, crispy, garlic, baked, vegetarian, party food, healthy, easy, appetizer