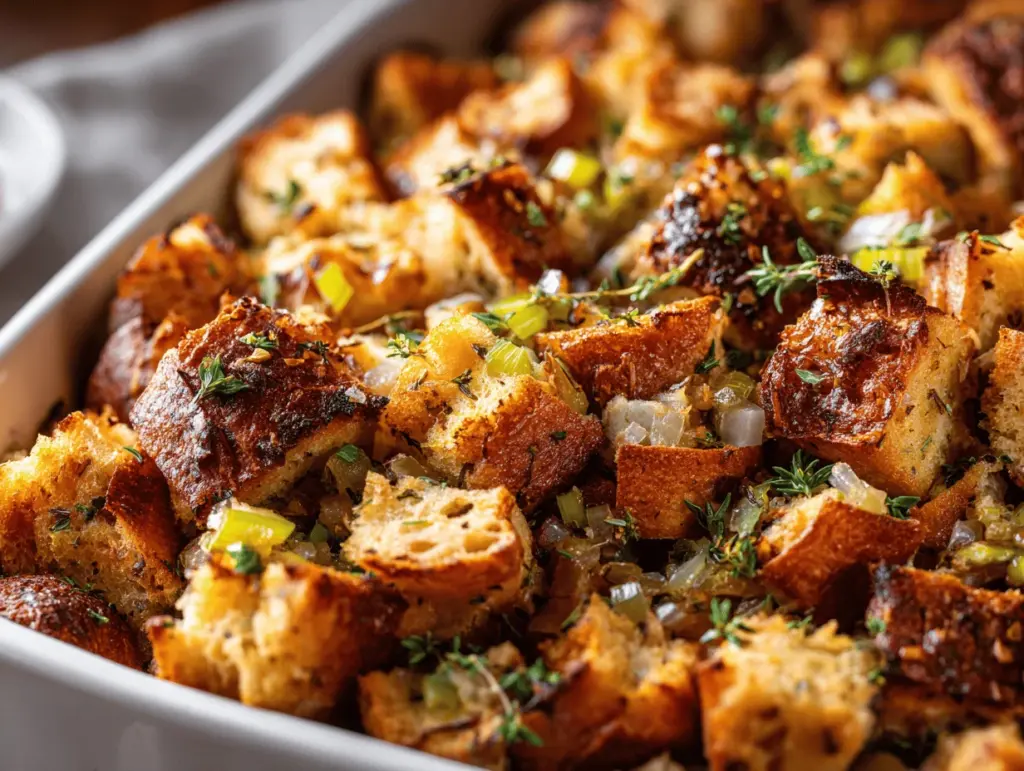
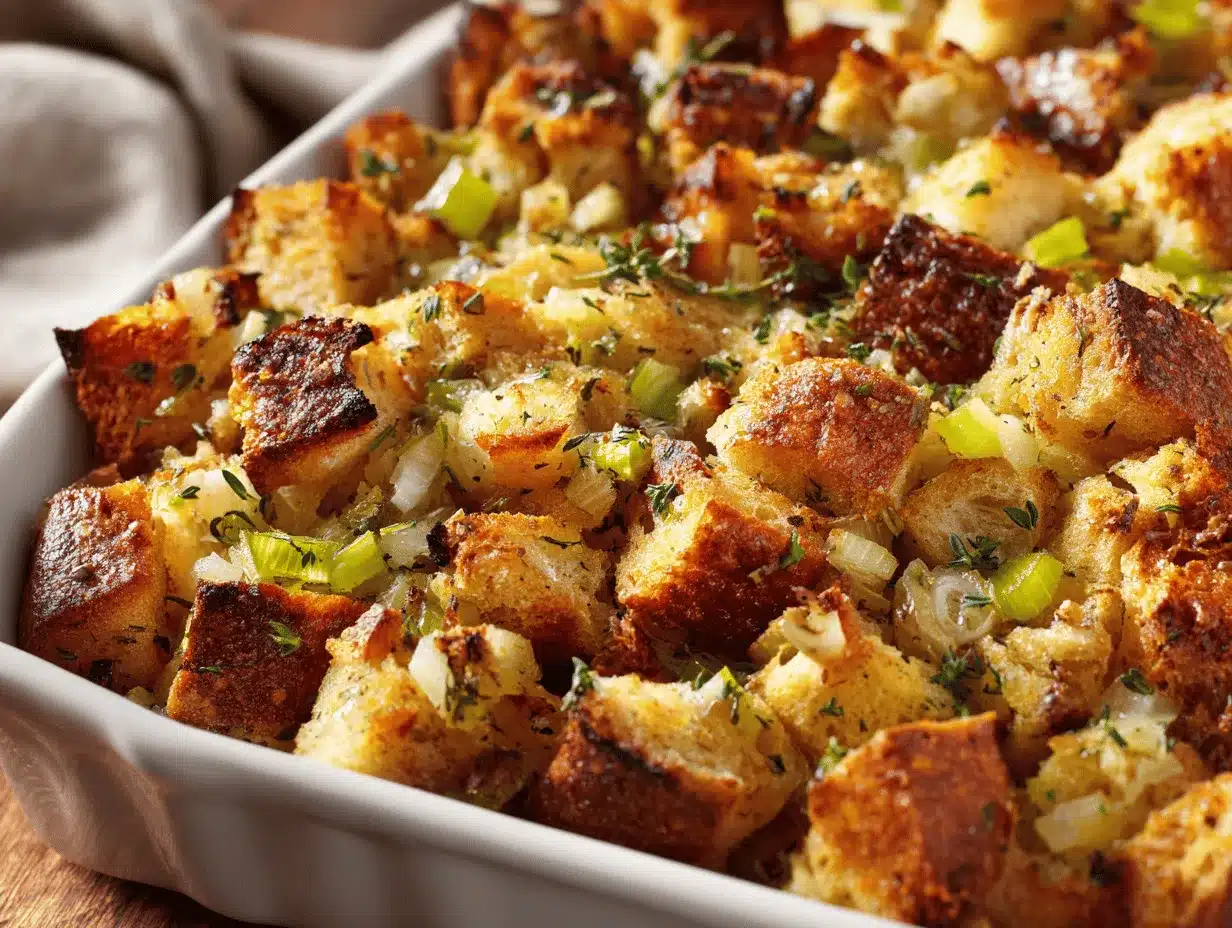
The scent of sautéed onions, fresh herbs, and toasty bread cubes drifting from the oven is pure nostalgia—if you close your eyes, you can practically hear the laughter from crowded holiday tables. I’ll never forget the first time I made Grandma’s Thanksgiving stuffing recipe on my own. I was a little nervous (there’s a lot of family rivalry over stuffing in our house), but honestly, once I tasted that first forkful—moist in the middle, crispy on top, buttery, and packed with flavor—I knew I’d found the real deal.
This classic savory dressing has been a fixture at our Thanksgiving dinners for as long as I can remember. Over the years, I’ve tested a few tweaks (sometimes adding more celery, sometimes a touch less sage), but nothing beats the original. There’s something comforting about knowing you’re making the same stuffing your grandma made for your parents, and they for you. It’s more than just a side dish; it’s a slice of family history on a plate.
What I love about this recipe is its balance. It’s rich but not heavy, savory enough to stand up to gravy and turkey, yet so good you’ll grab a cold spoonful from the fridge the next day. Whether you’re hosting for the first time or you’ve been in charge of Thanksgiving for decades, Grandma’s Thanksgiving stuffing recipe is foolproof. Perfect for picky eaters, easy to double for a crowd, and it always, always disappears. If you’re looking for the best classic savory dressing—look no further. After making this stuffing for years and seeing how it brings everyone together, I can say with all my heart: this is the only stuffing recipe you’ll ever need.
Why You’ll Love This Classic Stuffing Recipe
- Quick & Easy: Comes together in under an hour (plus bake time), so you’re not tied to the kitchen all day. Perfect for those last-minute holiday scrambles!
- Simple Ingredients: No hard-to-find stuff—just bread, veggies, herbs, and pantry basics. Bet you already have most of it at home.
- Perfect for the Holidays: This stuffing is made for big family gatherings, Friendsgiving, or even a cozy Sunday dinner. It’s got that “holiday magic” vibe.
- Crowd-Pleaser: You know it’s a winner when both kids and adults go back for seconds. Even my cousin who “hates stuffing” asks for the recipe now.
- Unbelievably Delicious: Crispy edges, tender center, and a deep, savory flavor that honestly makes the turkey jealous.
What makes Grandma’s Thanksgiving stuffing recipe stand out? First, it’s all about the bread: sturdy, slightly stale cubes soak up the broth and butter without turning mushy. Sautéing the onions and celery in butter until they’re soft brings out their sweetness and gives the stuffing its signature flavor. Fresh herbs—especially sage and thyme—make it taste like Thanksgiving. And here’s my not-so-secret step: a quick oven toast for the bread cubes before mixing. It gives every bite a satisfying texture, so you get both crunch and softness (no soggy stuffing here!).
This stuffing is pure comfort. It’s the kind of dish that makes you pause for a second, close your eyes, and really savor the moment. It’s also flexible—if you want to add sausage, mushrooms, or apples, go for it. But honestly, it’s perfect just as it is. Whether you’re making it for the first time or the fiftieth, Grandma’s recipe never lets you down. It’s the heart and soul of Thanksgiving—and that’s why I keep coming back to it, year after year.
What Ingredients You Will Need
This recipe uses simple, wholesome ingredients to deliver bold flavor and that perfect stuffing texture—without any complicated steps. Most of these are pantry staples, but I’ll share a few personal tips and substitution ideas so you can make it your own.
- Bread: 1 pound (about 450g) hearty white bread or French bread, cut into 1-inch cubes and slightly dried out (leave it out overnight or toast in the oven for 15-20 minutes at 300°F/150°C). (Use sourdough for a tangier flavor!)
- Unsalted Butter: 1 cup (2 sticks, 226g), melted (adds richness and helps brown the top—don’t skimp!)
- Yellow Onions: 2 large, finely chopped (about 2 cups/300g)
- Celery: 4 stalks, finely chopped (about 2 cups/200g) (adds crunch and classic flavor)
- Fresh Parsley: ½ cup (15g), chopped (for brightness and color)
- Fresh Sage: 2 tablespoons (5g), finely chopped (essential for that Thanksgiving taste—dried works in a pinch, but fresh is best)
- Fresh Thyme Leaves: 1 tablespoon (3g), chopped
- Salt: 1½ teaspoons (8g)—adjust to taste
- Black Pepper: 1 teaspoon (2g)
- Chicken or Vegetable Broth: 2½ – 3 cups (600–720ml), preferably low-sodium (I like Swanson for reliability—homemade is even better!)
- Eggs: 2 large, lightly beaten (helps bind everything)
Optional Add-Ins:
- Sausage: ½ pound (225g), cooked and crumbled (for extra savoriness)
- Mushrooms: 1 cup (100g), chopped and sautéed (adds umami and moisture)
- Apples: 1, peeled and diced (for a sweet-tart twist)
- To make gluten-free: Use a gluten-free loaf you love (I’ve had good results with Canyon Bakehouse)
- To make dairy-free: Swap in vegan butter (like Earth Balance)
- Herb Substitutions: If you only have dried herbs, use 1/3 the amount of fresh
If you’re prepping ahead, you can chop the veggies and herbs the day before—just store them in airtight containers in the fridge. I always make a little extra bread just for “quality control” (taste testing is part of the fun, right?). If you want a richer dressing, try using homemade bone broth. Or, if you like a lighter texture, use a mix of white and whole wheat bread.
Equipment Needed
- Large Skillet: For sautéing onions, celery, and optional sausage. (A cast iron pan works great, but any sturdy skillet will do.)
- Large Mixing Bowl: You’ll need plenty of room to toss everything together. I use my big glass bowl that’s survived countless holidays!
- Baking Dish: 9×13-inch (23x33cm) casserole dish or similar size. Glass or ceramic is best for an even bake and golden top.
- Sharp Knife & Cutting Board: For chopping bread, veggies, and herbs. (A serrated knife makes bread cubes easier and less crumbly!)
- Measuring Cups & Spoons: For accuracy—especially if you’re doubling or halving the recipe.
- Whisk: For beating eggs and mixing them into the broth.
- Aluminum Foil: To tent the stuffing while baking (helps prevent over-browning).
If you don’t have a large skillet, use any heavy-bottomed pan and sauté in batches. No 9×13 dish? Two smaller pans work just fine (and you get more crispy edges!). I’ve used disposable foil pans for big family gatherings—just increase the bake time by 5–10 minutes. To keep your casserole dish from scratching, avoid metal utensils. For easy cleaning, soak your pan right after serving (trust me, it’ll save you elbow grease later!). And if you’re on a budget, thrift stores often have great glass bakeware finds.
How to Make Grandma’s Thanksgiving Stuffing Recipe
-
Prep the Bread:
- Preheat oven to 300°F (150°C).
- Cut bread into 1-inch (2.5cm) cubes—should be about 10 cups (about 450g).
- Spread cubes in a single layer on baking sheets. Toast for 15–20 minutes, stirring once, until dry but not browned. Let cool.
- Tip: If your bread is already a day or two old, you can skip this step for a softer stuffing.
-
Sauté the Vegetables:
- In a large skillet over medium heat, melt 1 cup (226g) unsalted butter.
- Add 2 chopped onions and 4 chopped celery stalks. Cook, stirring often, until softened but not brown—about 10–12 minutes. You want them translucent and fragrant.
- Stir in ½ cup parsley, 2 tablespoons sage, and 1 tablespoon thyme. Cook 1–2 minutes until herbs are fragrant (it’ll smell like a Thanksgiving dream!).
-
Mix the Stuffing:
- In a large bowl, combine toasted bread cubes, sautéed veggies, and herbs. Sprinkle with 1½ teaspoons salt and 1 teaspoon black pepper.
- In a separate bowl, whisk together 2 large eggs and 2½ cups (600ml) broth.
- Pour egg-broth mixture over bread, tossing gently until evenly moistened. Add more broth as needed—stuffing should feel moist but not soggy. (If you squeeze a handful, it should just hold together.)
- Tip: If you like a crispy top, drizzle a bit more melted butter over the surface before baking.
-
Bake the Stuffing:
- Transfer mixture to a greased 9×13-inch (23x33cm) baking dish. Cover loosely with foil.
- Bake at 350°F (175°C) for 30 minutes. Remove foil and bake another 20–25 minutes until top is golden and crisp, and center is heated through.
- Let rest 10 minutes before serving—this helps everything set up and makes scooping easier.
- Warning: Overbaking can dry out the stuffing, so check at the 45-minute mark and add more broth if needed.
-
Troubleshooting:
- Too dry? Add a splash more warm broth and gently toss. Cover and bake another 5 minutes.
- Too wet? Bake uncovered a bit longer, checking every 5 minutes.
- Not enough flavor? A sprinkle of extra salt or a bit more fresh herbs does wonders.
Personal Tip: I always make a small “tester” ramekin alongside the main dish, just to check seasoning and doneness. Plus, it keeps hungry helpers out of the main pan until dinner time!
Cooking Tips & Techniques for Perfect Stuffing
Stuffing sounds simple, but there are a few tricks for nailing that perfect texture and flavor every time. Here’s what I’ve learned from years of holiday feasts (and a few, um, soggy disasters):
- Use Stale or Toasted Bread: Never fresh bread—it turns to mush. If you forgot to leave it out overnight, toasting works wonders.
- Sauté Veggies Slowly: Rushing this step can leave onions crunchy and raw-tasting. Go low and slow for maximum flavor.
- Moisture Matters: The bread should be moist, not drenched. Add broth gradually and mix gently. If it looks dry after baking, a little extra broth fixes it right up.
- Eggs Bind, But Don’t Overdo: Eggs help hold everything together, but too many can make stuffing rubbery. Two is just right for this amount.
- Crispy Top: Remove foil for the last 20 minutes of baking. If you want an extra golden finish, broil for 2–3 minutes at the end (just watch it closely—burnt tops happen fast!).
- Season Generously: Bread soaks up salt and herbs. Taste before baking and add more salt or pepper if needed.
- Make-Ahead Strategy: Assemble stuffing up to a day in advance, keep covered in the fridge, and bake just before serving. If baking straight from the fridge, add 10 minutes to the bake time.
- Multitasking Tips: Chop bread and veggies a day early. Use pre-chopped herbs to save time on the big day.
I once forgot the eggs and, honestly, it still tasted great—just a bit looser in texture. Don’t stress over perfection. The best stuffing is made with love (and a little flexibility!).
Variations & Adaptations
Everyone’s got their own stuffing style, right? Here are a few easy ways to make this stuffing recipe fit your table:
- For Sausage Lovers: Add ½ pound (225g) cooked, crumbled breakfast sausage to the veggie mixture. It gives the stuffing extra savoriness and a hearty bite.
- Gluten-Free: Swap the bread for your favorite gluten-free loaf. Dry it out just like regular bread. I’ve had family members rave about this version using Canyon Bakehouse.
- Vegetarian: Use vegetable broth and skip the sausage. You can also add sautéed mushrooms for a deeper, earthy flavor—I love a mix of cremini and shiitake.
- Apple & Cranberry: Toss in 1 diced apple and ½ cup dried cranberries for a sweet-tart pop (so festive for Thanksgiving!).
- Low-Sodium: Use unsalted butter and low-sodium broth. Taste and adjust seasoning as needed.
- Make it Spicy: Add a pinch of red pepper flakes or a diced jalapeño to the veggies for a little heat.
- Personal Favorite: I sometimes add toasted pecans or walnuts for crunch—you get a nutty surprise in every bite.
- Cooking Methods: You can also stuff this mixture inside your turkey (just reduce the broth by ½ cup and bake until the center hits 165°F/74°C). For individual servings, bake in muffin tins for “stuffing cups”—kids love them!
Don’t be afraid to play around! The basic structure is forgiving, so you can swap herbs, bread types, or mix-ins to suit your family’s tastes or dietary needs.
Serving & Storage Suggestions
This stuffing is best served warm, straight from the oven, with the top golden and a little crispy. I like to sprinkle a bit of fresh parsley on top for color—makes it extra inviting on the table. Pair it with turkey, roast chicken, or even as a cozy side for pork chops. It’s also fantastic with a spoonful of gravy (or cranberry sauce, if you ask my aunt!).
If you have leftovers (it’s rare, but it happens), store them in an airtight container in the fridge for up to 3 days. To reheat, cover with foil and bake at 350°F (175°C) for 15–20 minutes, or microwave individual portions until hot. For longer storage, stuffing freezes well—just wrap tightly and thaw overnight in the fridge before reheating. Honestly, I think the flavors deepen after a day or two, so it’s almost better the next day (perfect for those lazy, post-holiday sandwiches).
Nutritional Information & Benefits
This classic stuffing is rich and satisfying, clocking in at about 250 calories per serving (1/12th of the recipe), with 10g fat, 34g carbs, and 5g protein. The veggies add fiber, and fresh herbs like sage and parsley bring a dose of antioxidants. If you’re following a gluten-free or dairy-free diet, the recipe adapts easily—just swap out the bread and butter. Allergens to note: contains wheat, eggs, and dairy (unless you use substitutes above).
From a wellness perspective, I love that this stuffing packs in veggies and fresh herbs—it’s a holiday treat that feels a little less indulgent. And hey, it’s Thanksgiving! A little comfort food goes a long way for the soul.
Conclusion
If you’re looking for that one stuffing recipe you’ll return to every Thanksgiving (and maybe a few Sunday dinners, too), Grandma’s Thanksgiving stuffing recipe is it. It’s classic, savory, and full of heart. The kind of dish that makes people linger at the table just a little longer. Customize it, play with the mix-ins, or keep it old-school—the bones of this recipe are tried and true.
This stuffing has seen a lot of celebrations in my family, and I hope it brings the same warmth and joy to your table. If you give it a try, let me know how it turns out! Did you add sausage, or try it gluten-free? Drop a comment below, share your tweaks, or pass it on to someone who needs a little Thanksgiving inspiration. Wishing you a holiday full of delicious memories and second helpings—because honestly, isn’t that what it’s all about?
FAQs About Grandma’s Thanksgiving Stuffing Recipe
Can I make this stuffing ahead of time?
Yes! You can assemble the stuffing up to 24 hours in advance, cover, and refrigerate. Just add a few minutes to the baking time if it’s cold from the fridge.
What bread works best for this stuffing recipe?
Hearty white bread, French bread, or sourdough all work great. Avoid super-soft sandwich bread, as it can get mushy. Day-old bread is ideal for texture.
Can I stuff this inside my turkey?
You can, but reduce the broth by ½ cup and make sure the stuffing reaches 165°F (74°C) in the center for safety. I usually bake it separately for crispy edges.
Is this recipe gluten-free or dairy-free?
It’s not by default, but you can easily make it gluten-free with GF bread and dairy-free with plant-based butter. The flavors are still delicious!
How do I keep stuffing from getting soggy?
Use stale or toasted bread, add broth gradually, and bake uncovered for the last part to crisp the top. If it’s too wet, just bake a bit longer until it sets up.
Pin This Recipe!
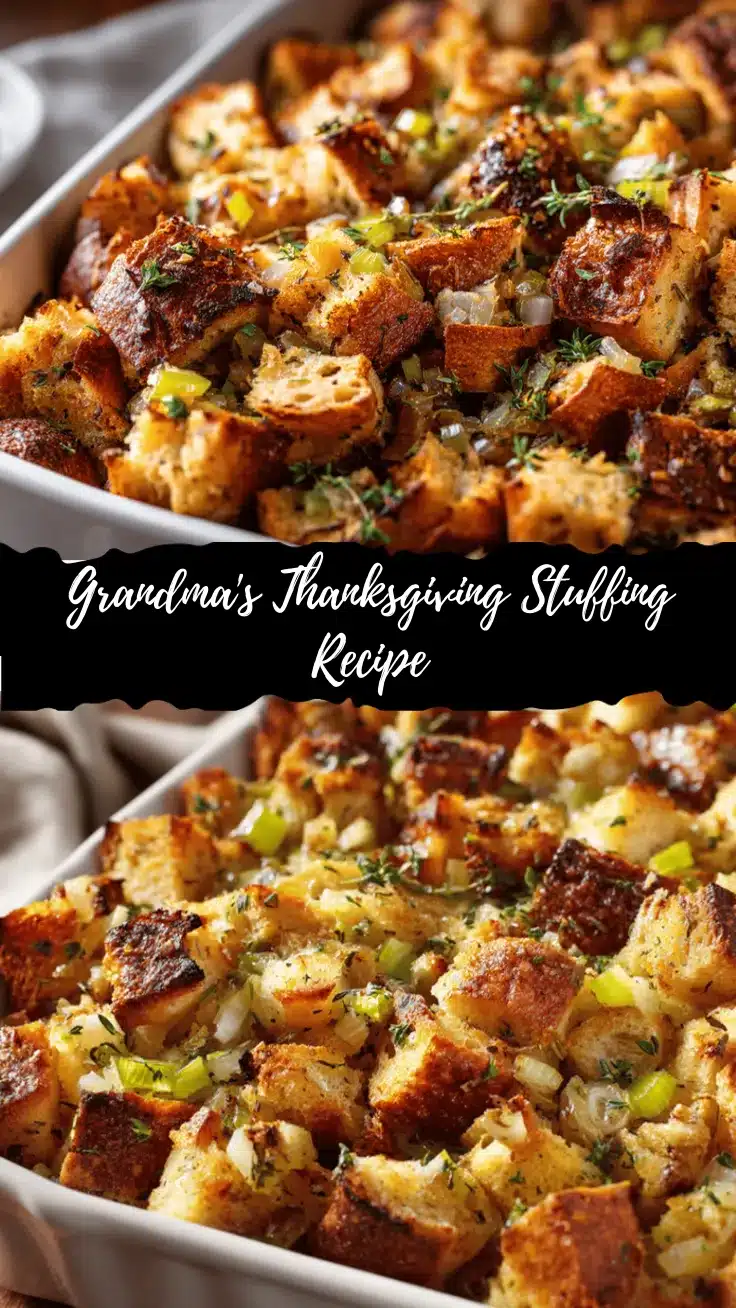

Grandma’s Thanksgiving Stuffing Recipe – Best Classic Savory Dressing
- Total Time: 1 hour 20 minutes
- Yield: 12 servings 1x
Description
This classic savory stuffing is a family favorite, featuring toasty bread cubes, sautéed onions and celery, fresh herbs, and a buttery, crisp top. Perfect for Thanksgiving or any holiday gathering, it’s moist in the middle, crispy on top, and packed with nostalgic flavor.
Ingredients
- 1 pound hearty white bread or French bread, cut into 1-inch cubes and slightly dried out (about 10 cups)
- 1 cup (2 sticks) unsalted butter, melted
- 2 large yellow onions, finely chopped (about 2 cups)
- 4 stalks celery, finely chopped (about 2 cups)
- 1/2 cup fresh parsley, chopped
- 2 tablespoons fresh sage, finely chopped
- 1 tablespoon fresh thyme leaves, chopped
- 1 1/2 teaspoons salt (adjust to taste)
- 1 teaspoon black pepper
- 2 1/2 to 3 cups low-sodium chicken or vegetable broth
- 2 large eggs, lightly beaten
- Optional: 1/2 pound cooked and crumbled sausage
- Optional: 1 cup mushrooms, chopped and sautéed
- Optional: 1 apple, peeled and diced
- Optional: 1/2 cup dried cranberries
- Optional: 1/2 cup toasted pecans or walnuts
Instructions
- Preheat oven to 300°F (150°C). Cut bread into 1-inch cubes and spread in a single layer on baking sheets. Toast for 15–20 minutes, stirring once, until dry but not browned. Let cool.
- In a large skillet over medium heat, melt butter. Add onions and celery; cook, stirring often, until softened but not brown, about 10–12 minutes.
- Stir in parsley, sage, and thyme. Cook 1–2 minutes until herbs are fragrant.
- In a large mixing bowl, combine toasted bread cubes, sautéed veggies, and herbs. Sprinkle with salt and pepper.
- In a separate bowl, whisk together eggs and 2 1/2 cups broth.
- Pour egg-broth mixture over bread, tossing gently until evenly moistened. Add more broth as needed; stuffing should feel moist but not soggy.
- Transfer mixture to a greased 9×13-inch baking dish. Cover loosely with foil.
- Bake at 350°F (175°C) for 30 minutes. Remove foil and bake another 20–25 minutes until top is golden and crisp, and center is heated through.
- Let rest 10 minutes before serving.
- Troubleshooting: If too dry, add a splash more warm broth and bake covered for 5 more minutes. If too wet, bake uncovered a bit longer.
Notes
Use stale or toasted bread for best texture. Sauté veggies slowly for maximum flavor. Add broth gradually to avoid soggy stuffing. For a crispy top, remove foil for the last 20 minutes of baking. Can be made ahead and baked just before serving. Easily adapted for gluten-free or dairy-free diets.
- Prep Time: 25 minutes
- Cook Time: 55 minutes
- Category: Side Dish
- Cuisine: American
Nutrition
- Serving Size: 1/12th of recipe (about 1 cup)
- Calories: 250
- Sugar: 4
- Sodium: 500
- Fat: 10
- Saturated Fat: 6
- Carbohydrates: 34
- Fiber: 2
- Protein: 5
Keywords: Thanksgiving, stuffing, dressing, classic, savory, holiday, bread, side dish, family recipe, easy, make-ahead, vegetarian, traditional