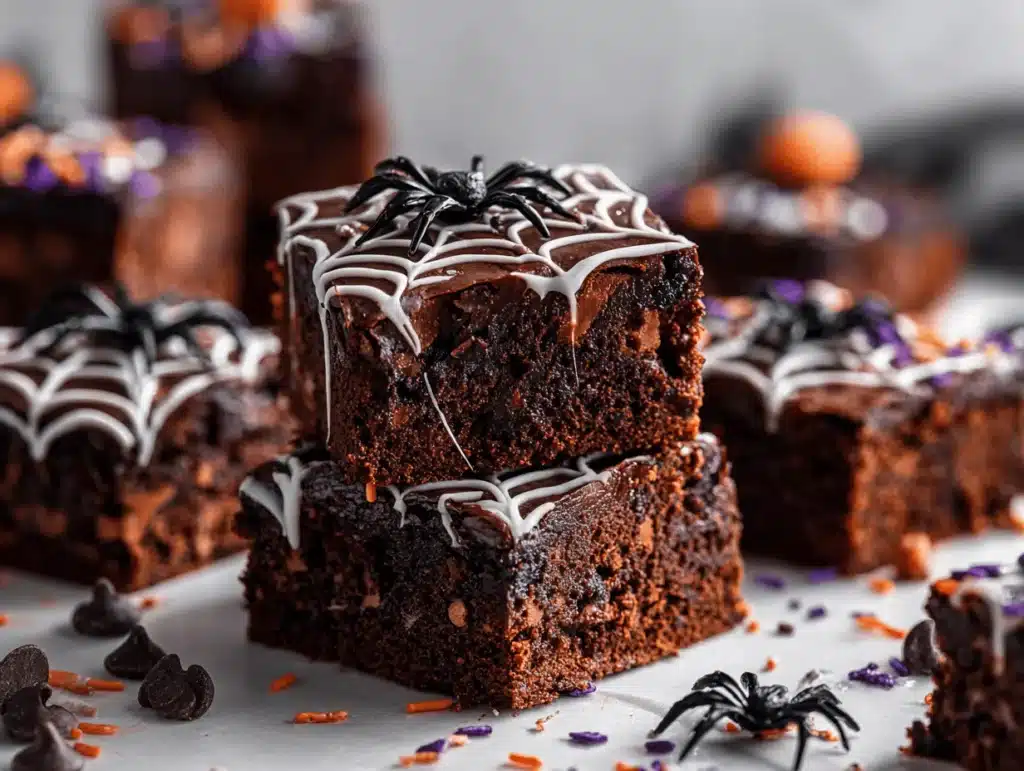
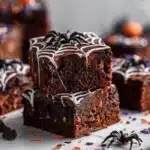
Chocolate wafting through the kitchen, sticky fingers, and laughter echoing—that’s what Spider Web Halloween Brownies bring to my autumn memories. The first time I made these ultra-fudgy treats, I was trying to impress my niece, who’s convinced she’s part witch (I mean, who am I to argue?). Let’s face it, Halloween desserts should be both spooky and irresistible, right? That’s where these brownies come in. They’re dense, rich, and decked out with a web of sweet white chocolate, making every bite a haunted celebration.
I stumbled onto the spider web design during a Pinterest scroll-fest, and honestly, it’s easier than you’d think! You don’t need fancy piping skills or hours of decorating—just a toothpick and a steady hand (or maybe just a steady-ish hand). These brownies are my go-to for Halloween parties, classroom treats, and cozy nights in when you want something spooky but not too scary. If you’re anything like me, you want a dessert that gets ooohs and ahhhs but doesn’t leave you with a mountain of dishes. Spider Web Halloween Brownies nail that balance.
After a dozen batches (yes, I lost count at some point), I’ve perfected this recipe so it’s foolproof—even for those who claim they can’t bake. As a food blogger who’s tested more brownie recipes than I care to admit, I can promise you: these are ultra-fudgy, satisfyingly chocolatey, and spooky enough to earn a spot on your Halloween dessert table. Whether you’re baking for a crowd or just yourself (no judgment here), these brownies are everything you want in a seasonal treat—plus, that spider web design really does make people stop and stare!
Why You’ll Love This Recipe
If you’ve ever been let down by dry, bland brownies at a Halloween party, prepare to be wowed. Spider Web Halloween Brownies are a game-changer—here’s why they’re my top pick for spooky celebrations:
- Quick & Easy: You can whip up the batter in under 15 minutes. If you’re running late or juggling costumes, these brownies save the day.
- Simple Ingredients: No need to hunt down obscure items. You probably have everything you need in your pantry (and if not, your local grocery store does).
- Perfect for Halloween Gatherings: The spider web design makes these brownies the star of any party table—kids point, adults snap photos, and everyone grabs seconds.
- Crowd-Pleaser: I’ve tested this recipe with picky eaters, chocolate fanatics, and even my skeptical neighbor. Not a crumb left.
- Unbelievably Delicious: These aren’t just cute—they’re ultra-fudgy, deeply chocolatey, and have that perfect crackly top.
What sets these brownies apart? I blend melted chocolate and cocoa powder for extra depth, and don’t skimp on the butter. The spider web is made with melted white chocolate—not icing—so it sets with a gorgeous sheen and a smooth bite. I’ve tweaked ratios, tried different brands, and even experimented with gluten-free flours (more on that later), just to make sure this recipe works for everyone.
Honestly, when you pull these brownies out of the oven and swirl on that spider web, it feels like magic. They’re the kind of treat that make you close your eyes after the first bite. Whether you’re hosting a spooky bash or just want to add a little Halloween whimsy to your week, these brownies are guaranteed to bring smiles and maybe a few happy shivers.
Ingredients Needed
This recipe uses straightforward, reliable ingredients to create an ultra-fudgy base and a striking spider web finish. You can easily find these at any grocery store, and most are probably already hanging out in your kitchen.
- For the Brownie Batter:
- 1/2 cup (115g) unsalted butter, melted (adds richness and fudginess)
- 6 oz (170g) bittersweet chocolate, chopped (I like Ghirardelli or Lindt for best flavor)
- 1 cup (200g) granulated sugar
- 2 large eggs, room temperature
- 1 tsp vanilla extract (for aroma)
- 1/2 cup (65g) all-purpose flour (swap for 1:1 gluten-free blend if needed)
- 1/4 cup (25g) unsweetened cocoa powder (Dutch-process for deeper color)
- 1/4 tsp salt
- For the Spider Web Decoration:
- 1/2 cup (85g) white chocolate chips or chopped white chocolate (for melting)
- 1 tsp coconut oil or neutral oil (optional, for smoother melting)
- Optional Add-Ins & Toppings:
- 1/3 cup (60g) mini chocolate chips (fold into batter for extra gooeyness)
- Halloween sprinkles (for extra flair)
Ingredient Tips:
I always use real butter (not margarine) for the richest taste. If you want a dairy-free option, swap in Earth Balance and use dairy-free chocolate. For the white chocolate, go for a good-quality bar if you can—cheaper chips sometimes don’t melt smoothly. If you’re in a rush, microwave the chocolate in short bursts to avoid scorching. For gluten-free brownies, King Arthur’s Measure for Measure flour is my go-to. And don’t forget—you can mix in a handful of chopped walnuts if you want extra texture!
Whether you go classic or customize, the ingredients work together to make every bite ooey-gooey and perfectly spooky.
Equipment Needed
You don’t need fancy gear to make Spider Web Halloween Brownies—just a few reliable tools. Here’s what I use every time:
- 8×8-inch (20x20cm) baking pan (lined with parchment for easy removal)
- Medium heatproof mixing bowl (for melting chocolate and butter)
- Wire whisk (for blending batter)
- Rubber spatula (for scraping down the bowl and folding in chips)
- Toothpicks or thin skewers (for spider web swirling)
- Small microwave-safe bowl (for melting white chocolate)
- Measuring cups and spoons (accuracy matters!)
If you don’t have a square pan, a round cake pan works—just adjust baking time by a few minutes. I’ve used an old Pyrex dish with great results, and even tried disposable pans for big parties. Toothpicks are perfect for drawing webs, but a thin bamboo skewer works too. For budget-friendly options, I recommend Wilton parchment sheets and IKEA spatulas (sturdy and cheap). If you use nonstick pans, wipe with a tiny bit of oil before lining—it helps prevent sticking. Keep your pans in good shape by hand-washing and using gentle scrubbers; it really pays off in the long run.
Preparation Method
- Preheat & Prep:
Preheat your oven to 350°F (175°C). Line your 8×8-inch (20x20cm) pan with parchment, leaving some overhang for easy lifting. Lightly grease the parchment.
Prep Tip: If your parchment won’t stay put, crumple it first, then flatten—it’ll cling to the pan without fuss. - Melt Chocolate & Butter:
In a medium heatproof bowl, combine 6 oz (170g) chopped bittersweet chocolate and 1/2 cup (115g) butter. Microwave in 30-second bursts, stirring between each, until smooth and glossy. Let cool for 3-4 minutes.
Sensory Cue: The mixture should be shiny and smell rich—not scorched! - Mix Wet Ingredients:
Whisk in 1 cup (200g) granulated sugar until fully combined. Add 2 large eggs and 1 tsp vanilla extract, whisking until the mixture turns pale and slightly thick.
Prep Note: If it looks separated, just keep whisking—eggs pull it together. - Combine Dry Ingredients:
In a small bowl, sift together 1/2 cup (65g) flour, 1/4 cup (25g) cocoa powder, and 1/4 tsp salt. Fold into wet mixture with a rubber spatula until no dry streaks remain.
Troubleshooting: Overmixing leads to cakey brownies—stop when you see a uniform batter. - Fold in Add-Ins:
If using, gently fold in 1/3 cup (60g) mini chocolate chips or nuts.
Prep Note: Chips melt into pockets of goo—yum! - Pour & Smooth:
Scrape batter into prepared pan, smoothing the top. Tap the pan gently on the counter to release air bubbles.
Sensory Cue: The batter should be thick and shiny. - Bake:
Bake for 22-27 minutes, or until a toothpick inserted in the center comes out with moist crumbs (not wet batter). Edges should be set, center slightly soft.
Time Estimate: My oven takes 25 minutes—check at 22 for fudgier brownies.
Warning: Overbaking dries them out, so keep a close eye! - Cool Completely:
Let brownies cool in the pan on a wire rack for at least 1 hour. This helps the fudgy texture set perfectly.
Prep Note: Patience is tough, but warm brownies can make the web design melt. - Melt White Chocolate:
Place 1/2 cup (85g) white chocolate and 1 tsp coconut oil in a microwave-safe bowl. Microwave in 15-second bursts, stirring between each, until smooth.
Troubleshooting: If chocolate seizes, add a touch more oil and stir vigorously. - Decorate:
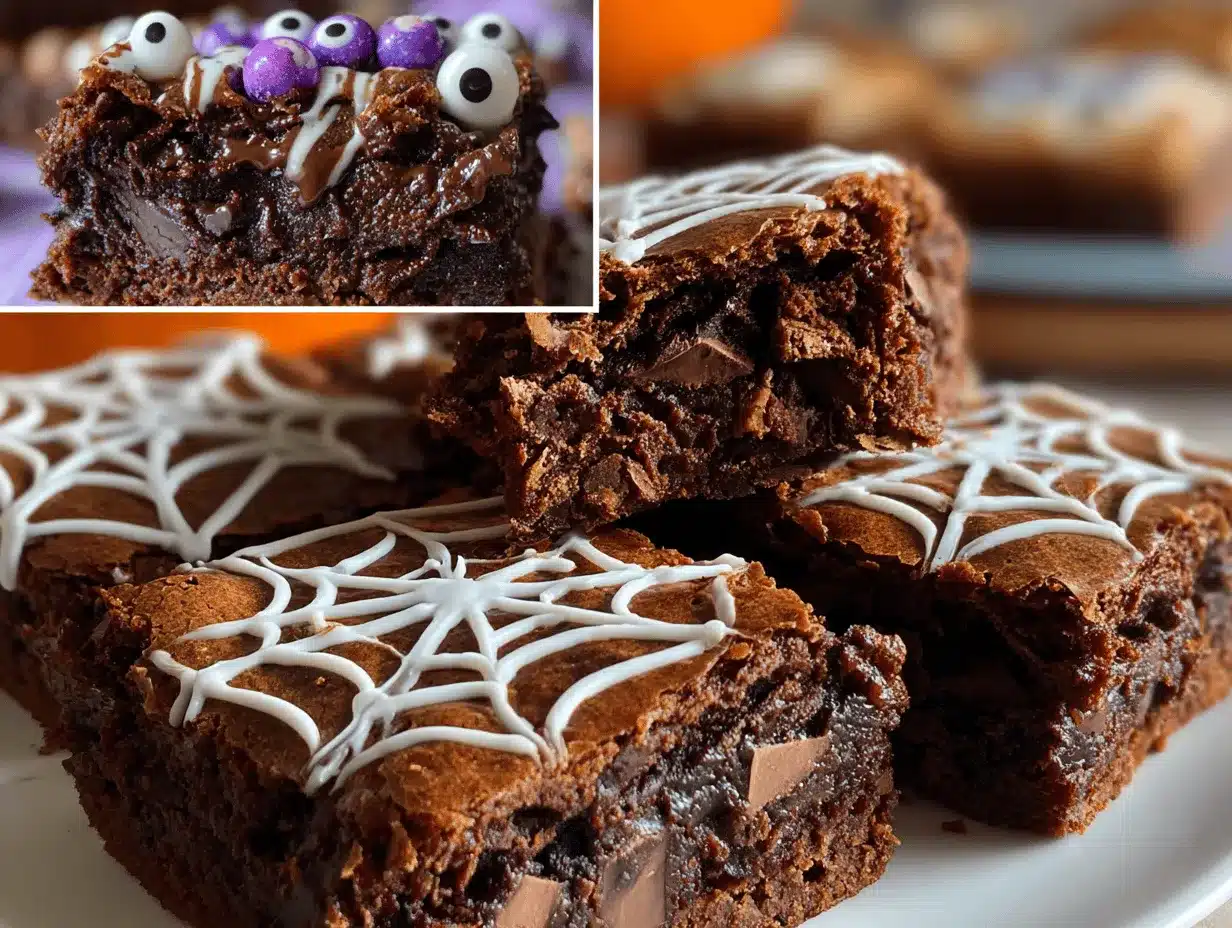
Transfer melted chocolate to a piping bag or zip-top bag with a small corner snipped. Pipe concentric circles on top of cooled brownies. Drag a toothpick from center outward to create a web effect.
Sensory Cue: The web should be crisp, not runny. If it smears, let chocolate cool for a minute to thicken.
Personal Tip: I sometimes add a chocolate spider in one corner—just for fun! - Slice & Serve:
Lift brownies from pan using parchment overhang. Cut into squares with a sharp knife, wiping between cuts for clean edges.
Prep Note: For extra wow, sprinkle on Halloween sprinkles or place plastic spiders for presentation.
Cooking Tips & Techniques
Brownie baking is a little like magic—one minute they’re gooey, the next they’re dry. Here’s what I’ve learned (sometimes the hard way):
- Don’t Overbake: Set a timer and check early. The brownies firm up as they cool, so a slightly underbaked center is your friend.
- Quality Chocolate Matters: Use real chocolate bars if you can—chips have stabilizers that change texture. I love Ghirardelli or Lindt for both batter and web.
- Room Temp Eggs: Cold eggs can cause the batter to seize. If you forget, place eggs in warm water for 5 minutes before cracking.
- Melting Chocolate: Microwave in short bursts and stir often. White chocolate is finicky—don’t rush or it will seize.
- Parchment Trick: Crumple and flatten parchment before lining—it keeps corners from popping up and batter from leaking underneath.
- Web Design: Pipe circles, then drag a toothpick outward from the center. I’ve done this dozens of times, and honestly, messy webs look even spookier!
- Cut Clean Squares: Chill brownies for 30 minutes before slicing for perfect, Instagram-ready edges.
- Multitasking: While brownies bake, melt white chocolate and prep decorations—keeps things moving and makes cleanup easier.
I’ve had batches overbake by minutes and turn cakey (still tasty, but not ultra-fudgy). If that happens, drizzle with extra melted chocolate—no one complains. Consistency comes from following the steps, but don’t stress about perfection. Halloween is about fun and a little bit of scary, after all.
Variations & Adaptations
Brownies are endlessly customizable. Here are some of my favorite twists for Spider Web Halloween Brownies:
- Gluten-Free: Swap the flour for a 1:1 gluten-free blend (King Arthur or Bob’s Red Mill). The texture stays fudgy—no one will guess!
- Dairy-Free: Use vegan butter and dairy-free chocolate. Melted coconut oil works in place of butter, and Enjoy Life chocolate chips are my pick for allergy-friendly baking.
- Flavor Boosts: Add 1/2 tsp instant espresso powder to the batter for richer chocolate flavor. Or swirl in 2 Tbsp creamy peanut butter before baking for a Reese’s-inspired treat.
- Seasonal Swaps: Top with orange-colored candy melts instead of white chocolate for a pumpkin vibe.
- Nutty Crunch: Fold in 1/3 cup chopped walnuts or pecans for texture and flavor.
- Spooky Mix-Ins: Stir in crushed Oreos or Halloween M&M’s for color and crunch.
I’ve tried a version with almond flour for a low-carb treat, and it’s surprisingly good—just slightly less fudgy. If you want extra “spider” drama, pipe a little dark chocolate spider in the center of each web. There are so many ways to make these brownies your own—just don’t skip the web. It’s the best part!
Serving & Storage Suggestions
Spider Web Halloween Brownies are best served at room temperature, where the fudgy texture really shines. I like to arrange them on a black platter, scatter a few plastic spiders, and maybe light a candle for spooky ambiance (Pinterest-worthy, trust me).
- Serving: Cut into squares or rectangles. For parties, you can slice small bites for a dessert buffet. Pair with cold milk, spiced cider, or hot cocoa.
- Presentation: Sprinkle Halloween sprinkles or edible glitter before the chocolate sets for a magical look. A drizzle of orange or purple icing adds extra flair.
- Storage: Store brownies in an airtight container at room temperature for up to 3 days. For longer storage, refrigerate up to 1 week (they’ll firm up but stay moist).
- Freezing: Wrap individual squares tightly in plastic wrap, then in a freezer bag. Freeze for up to 2 months. Thaw at room temp—web design stays intact!
- Reheating: Microwave a square for 10 seconds for warm, gooey goodness. The aroma is out of this world.
Pro tip: Flavors deepen overnight, so if you make these ahead, they’ll taste even richer the next day. Just keep the web decorations safe from humidity so they stay crisp.
Nutritional Information & Benefits
Here’s a quick look at what’s inside each Spider Web Halloween Brownie (per square, assuming 16 servings):
- Calories: Approx. 180
- Fat: 10g
- Carbs: 22g
- Protein: 2g
- Fiber: 2g
Health Highlights: Cocoa powder delivers antioxidants, and real chocolate provides magnesium for a little wellness boost. If you use nuts or almond flour, you’ll add healthy fats and extra protein. These can be made gluten-free or dairy-free for dietary needs (see variations above). Potential allergens: dairy, gluten (unless substituted), eggs, and nuts if added. Personally, I love knowing exactly what goes in—no mystery ingredients, just honest chocolatey goodness.
Conclusion
If you’re searching for a Halloween dessert that’s as fun to make as it is to eat, Spider Web Halloween Brownies are your answer. They’re ultra-fudgy, packed with real chocolate flavor, and honestly, that web design steals the show every time. I’ve made these for parties, family nights, and even solo treat-yourself evenings—they never disappoint.
Don’t be afraid to tweak ingredients or decoration styles—make them your own! The recipe is forgiving, and even if your web isn’t perfect, the brownies will be. Personally, I love the joy these bring to my kitchen, and the memories they create with every batch. So grab your mixing bowl and get baking!
If you try these Spider Web Halloween Brownies, please drop a comment below—share your decorating tips, your favorite add-ins, or even your baking bloopers. Tag me if you post pics, and let’s make this Halloween extra delicious and a little bit spooky together!
Frequently Asked Questions
Can I make Spider Web Halloween Brownies ahead of time?
Absolutely! Bake them up to two days ahead, decorate after cooling, and store in an airtight container. The flavors deepen overnight and the web design stays crisp.
How do I get the spider web to look neat?
Pipe circles with melted white chocolate, then drag a toothpick outward from the center. If the chocolate is too runny, let it cool for a minute before swirling. Messy webs look great too—don’t stress about perfection!
Can I freeze these brownies?
Yes! Wrap individual squares tightly and freeze for up to 2 months. Thaw at room temperature and enjoy—web design stays beautiful.
What’s the best chocolate for ultra-fudgy brownies?
I recommend real bittersweet chocolate bars (like Ghirardelli or Lindt). Chips work in a pinch but bars deliver deeper flavor and smoother texture.
Are these brownies gluten-free or dairy-free?
They’re easily adaptable! Use gluten-free flour or vegan butter and dairy-free chocolate to suit your dietary needs. See the variations section for details.
Pin This Recipe!
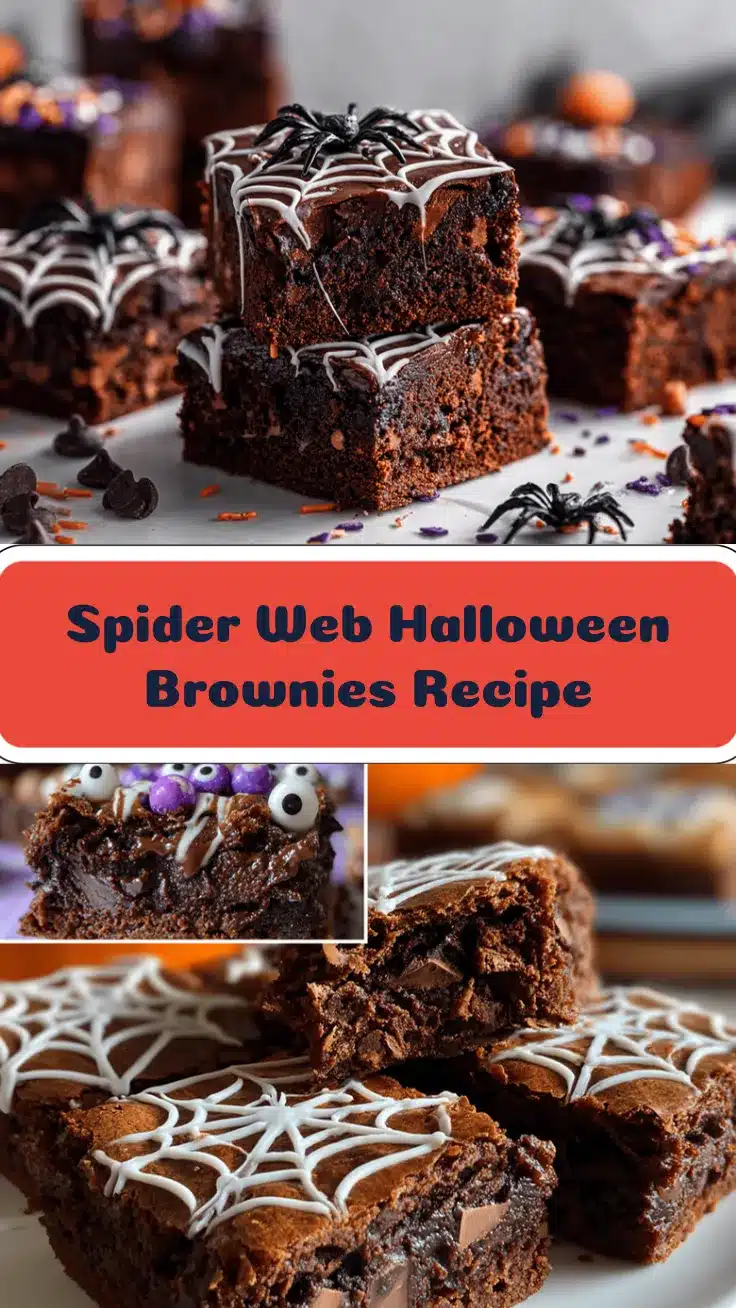
Spider Web Halloween Brownies
- Total Time: 1 hour 40 minutes
- Yield: 16 brownies 1x
Description
Ultra-fudgy, rich chocolate brownies decorated with a spooky white chocolate spider web—perfect for Halloween parties or cozy autumn nights. Easy to make, crowd-pleasing, and customizable for gluten-free or dairy-free diets.
Ingredients
- 1/2 cup (115g) unsalted butter, melted
- 6 oz (170g) bittersweet chocolate, chopped
- 1 cup (200g) granulated sugar
- 2 large eggs, room temperature
- 1 tsp vanilla extract
- 1/2 cup (65g) all-purpose flour (or 1:1 gluten-free blend)
- 1/4 cup (25g) unsweetened cocoa powder
- 1/4 tsp salt
- 1/2 cup (85g) white chocolate chips or chopped white chocolate
- 1 tsp coconut oil or neutral oil (optional, for smoother melting)
- 1/3 cup (60g) mini chocolate chips (optional, fold into batter)
- Halloween sprinkles (optional, for decoration)
Instructions
- Preheat oven to 350°F (175°C). Line an 8×8-inch baking pan with parchment paper, leaving overhang for easy lifting. Lightly grease the parchment.
- In a medium heatproof bowl, combine chopped bittersweet chocolate and melted butter. Microwave in 30-second bursts, stirring between each, until smooth and glossy. Let cool for 3-4 minutes.
- Whisk in granulated sugar until fully combined. Add eggs and vanilla extract, whisking until the mixture turns pale and slightly thick.
- In a small bowl, sift together flour, cocoa powder, and salt. Fold into the wet mixture with a rubber spatula until no dry streaks remain.
- If using, gently fold in mini chocolate chips or nuts.
- Scrape batter into prepared pan, smoothing the top. Tap the pan gently on the counter to release air bubbles.
- Bake for 22-27 minutes, or until a toothpick inserted in the center comes out with moist crumbs (not wet batter). Edges should be set, center slightly soft.
- Let brownies cool in the pan on a wire rack for at least 1 hour.
- Place white chocolate and coconut oil in a microwave-safe bowl. Microwave in 15-second bursts, stirring between each, until smooth.
- Transfer melted chocolate to a piping bag or zip-top bag with a small corner snipped. Pipe concentric circles on top of cooled brownies. Drag a toothpick from center outward to create a web effect.
- Lift brownies from pan using parchment overhang. Cut into squares with a sharp knife, wiping between cuts for clean edges.
- Decorate with Halloween sprinkles or edible glitter if desired.
Notes
For gluten-free brownies, use a 1:1 gluten-free flour blend. For dairy-free, substitute vegan butter and dairy-free chocolate. Don’t overbake—brownies firm up as they cool. Chill brownies before slicing for clean edges. Messy webs look great too! Store in an airtight container at room temperature for up to 3 days, or freeze for up to 2 months.
- Prep Time: 15 minutes
- Cook Time: 25 minutes
- Category: Dessert
- Cuisine: American
Nutrition
- Serving Size: 1 brownie square (1/16 of pan)
- Calories: 180
- Sugar: 16
- Sodium: 60
- Fat: 10
- Saturated Fat: 6
- Carbohydrates: 22
- Fiber: 2
- Protein: 2
Keywords: Halloween brownies, spider web brownies, fudgy brownies, chocolate brownies, Halloween dessert, spooky treats, easy brownies, party brownies, gluten-free brownies, dairy-free brownies