Introduction
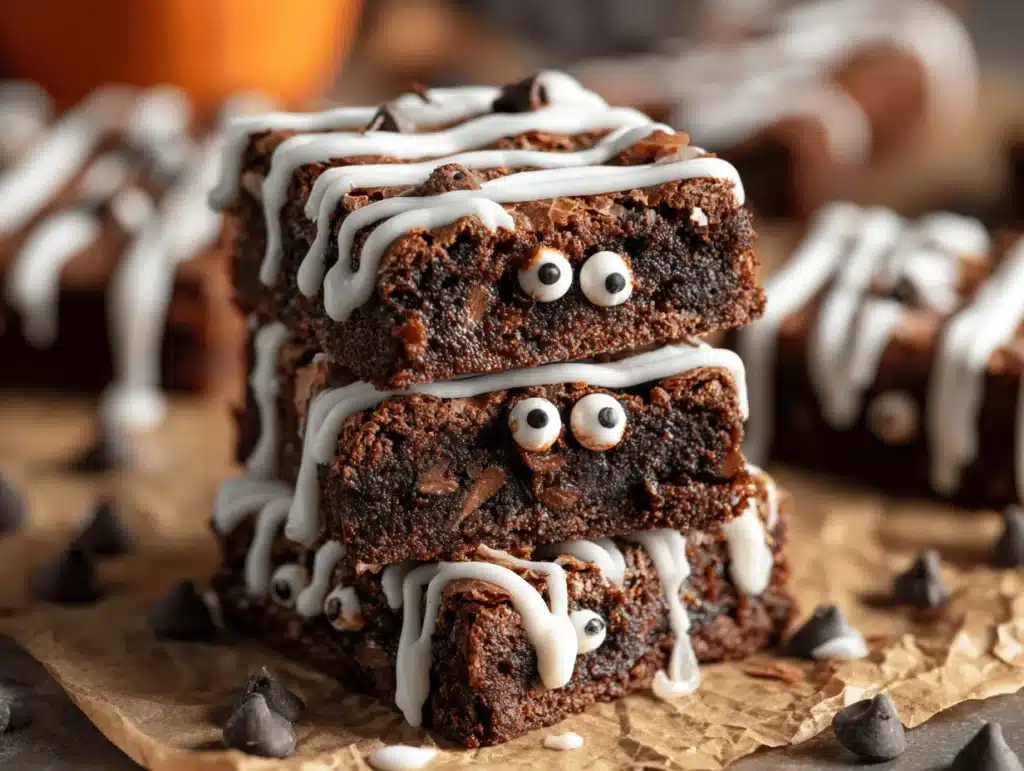
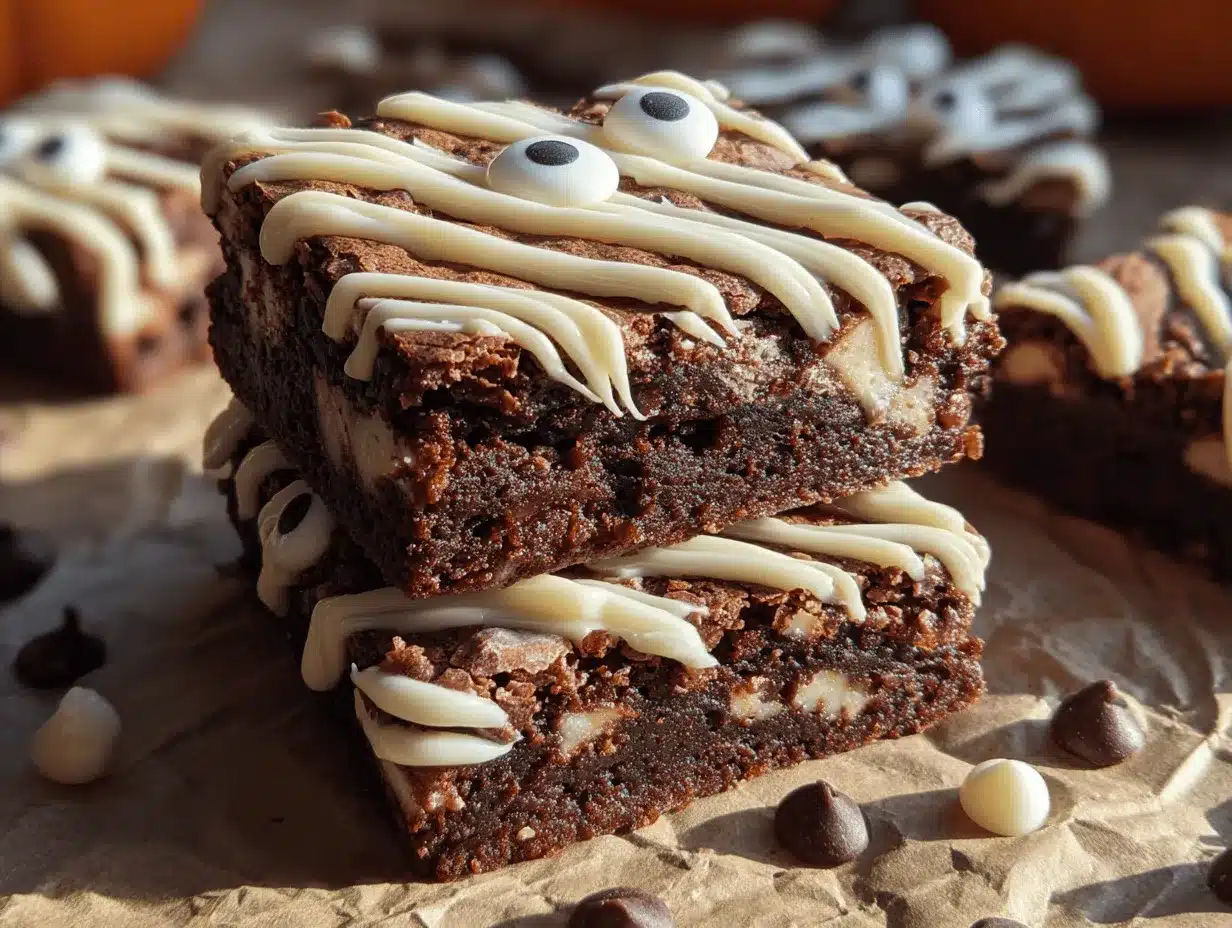
There’s nothing quite like the thrill of Halloween night—the crisp air, the crunch of leaves, and the sweet scent of chocolate wafting from the kitchen. I’ll never forget the first time I whipped up these Spooky Mummy Brownies. My daughter peeked over the counter, wide-eyed, as I drizzled “bandages” of white chocolate across fudgy brownies, transforming them into the cutest (and creepiest) little mummies you’ve ever seen. Honestly, these treats have become our family’s official kickoff for spooky season. They’re easy, ridiculously fun, and absolutely perfect for kids—whether you’re hosting a classroom party, a neighborhood bash, or just want to surprise your little monsters after school.
What I love most about this Spooky Mummy Brownies recipe is its simplicity. There’s no need for fancy decorating skills (trust me, I can barely pipe a straight line), and you can use your favorite brownie mix or go homemade if you feel fancy. The transformation happens with a few quick drizzles and candy eyes—suddenly, you’ve got a tray full of Halloween magic! As someone who’s tested dozens of Halloween treats over the years, these brownies are always the first to disappear. They’re chewy, chocolatey, and just the right amount of spooky. Plus, kids can help decorate—messy white chocolate zigzags are basically encouraged!
If you’re looking for easy Halloween treats kids love, this Spooky Mummy Brownies recipe is your answer. It’s foolproof, customizable, and guaranteed to make your October a little sweeter (and a lot more fun). Whether you’re a baking newbie or a Halloween fanatic like me, you’ll find these brownies are a must-have for your spooky celebrations.
Why You’ll Love This Recipe
- Quick & Easy: These Spooky Mummy Brownies come together in under an hour (including cooling time), so you’re not stuck in the kitchen all day. Perfect for last-minute party prep or a surprise treat for the kids.
- Simple Ingredients: You don’t need anything wild—just brownie mix (or homemade batter), white chocolate, and candy eyes. Most of it’s probably already in your pantry.
- Perfect for Halloween Parties: These brownies are a showstopper for classroom celebrations, family gatherings, and trick-or-treat night. I’ve brought them to potlucks, and they always spark conversations.
- Crowd-Pleaser: Kids go nuts for the googly candy eyes and squiggly mummy “wraps.” Adults love the rich, fudgy chocolate base. It’s one of the few treats that bridges the age gap.
- Unbelievably Delicious: The combination of soft, chewy brownies and creamy white chocolate is just next-level comfort food. I’ve had folks ask for seconds before I even put the tray down!
What sets this Spooky Mummy Brownies recipe apart is how approachable it is. No special skills needed—just drizzle, stick on some eyes, and you’ve got a batch of treats that look like you spent hours on them. I always use a piping bag for the mummy wraps, but you can snip the corner off a plastic bag if that’s what you’ve got. The result? Each brownie is delightfully imperfect, which makes them even cuter.
Honestly, I think these brownies are more than just a Halloween treat. They’re a memory-maker. Decorating them with my kids is one of my favorite seasonal traditions. There’s laughter, a little bit of chaos, and a lot of chocolate smudges. These brownies aren’t just good—they’re the kind that make you smile as soon as you see them. Whether you’re trying to impress your friends or just want to make your family’s night a little more magical, Spooky Mummy Brownies are your ticket to Halloween fun.
Ingredients Needed
This recipe uses basic, wholesome ingredients to deliver bold chocolate flavor and fun, spooky style—without the fuss. Most are pantry staples, and you can swap things around to suit dietary needs or what you’ve got on hand.
- For the Brownie Base:
- 1 box brownie mix (18-20 oz, any brand you love)
- 2 large eggs (room temperature, helps with a fudgy texture)
- 1/2 cup (120 ml) vegetable oil (or melted coconut oil for a subtle flavor twist)
- 1/4 cup (60 ml) water (or brewed coffee for extra richness)
- Optional Homemade Brownie Batter:
- 1 cup (120 g) all-purpose flour
- 1/2 cup (45 g) unsweetened cocoa powder
- 1 cup (200 g) granulated sugar
- 1/2 cup (115 g) unsalted butter, melted
- 2 large eggs
- 1/4 tsp (1 g) salt
- 1/2 tsp (2.5 ml) vanilla extract
- For Mummy Decoration:
- 1 cup (175 g) white chocolate chips (or melting wafers for smoother drizzles)
- 24 candy eyes (available at most grocery stores in October or online)
- Optional: black decorating gel (for extra spooky details)
Ingredient Tips: I recommend Ghirardelli or Hershey’s for brownie mix—never had a dry batch with either. For white chocolate, Guittard or Wilton melting wafers melt super smooth. Candy eyes are a must for the mummy look, but you can swap in mini chocolate chips if you’re in a pinch (they won’t be as googly, but they still work!). If you want a gluten-free option, use your favorite GF brownie mix. For dairy-free, swap butter for vegan margarine and use a dairy-free white chocolate brand.
Want to get creative? You can add a pinch of cinnamon to the batter, fold in mini marshmallows, or sprinkle crushed Oreos on top before baking. I’ve tried swapping water for coffee—it makes the chocolate flavor pop! Kids love to pick their own “eye” placement, so let them go wild. These ingredients are flexible, so there’s room to play.
Equipment Needed
- 9×13-inch (23×33 cm) baking pan (or use two 8×8 pans for thicker brownies)
- Parchment paper (makes it super easy to lift brownies out)
- Mixing bowls (one large, one small for melting chocolate)
- Whisk and spatula (I use silicone for easy cleanup)
- Piping bag or zip-top plastic bag (for drizzling white chocolate)
- Microwave-safe bowl (for melting white chocolate)
- Toothpick or skewer (for fixing chocolate “bandages,” if needed)
If you don’t have a piping bag, a zip-top bag with the corner snipped off is perfect for the mummy wraps. I’ve even used a spoon in a pinch—it’s messier but still adorable. For the baking pan, I’ve tried both metal and glass. Metal gives a crispier edge, glass is softer. Don’t forget to line your pan with parchment for easy removal—trust me, it makes a huge difference! If you love Halloween baking, invest in a reusable piping bag. Just rinse it out after each use, and you’re ready for your next spooky project. For budget-friendly options, most dollar stores carry candy eyes and parchment paper in October.
Preparation Method
- Prep the Pan & Oven: Preheat your oven to 350°F (175°C). Line a 9×13-inch (23×33 cm) pan with parchment paper, leaving an overhang for easy brownie removal. (Don’t skip the parchment—it makes cleanup a breeze!)
- Mix the Brownie Batter: In a large bowl, combine brownie mix, eggs, oil, and water (or coffee). Stir until just combined—don’t overmix, or you’ll lose that fudgy texture. If you’re using homemade batter, whisk together melted butter and sugar, then add eggs and vanilla. Stir in flour, cocoa, and salt until smooth.
- Bake the Brownies: Pour the batter into your prepared pan and spread evenly. Bake for 25-30 minutes (for box mix) or 30-35 minutes (homemade) until the edges are set and a toothpick comes out with a few moist crumbs. (If you want extra gooey brownies, pull them out when the center is just barely set!)
- Cool Completely: Let brownies cool in the pan for 10 minutes, then lift them out using the parchment and cool completely on a wire rack. (Warm brownies will melt your mummy wraps—patience pays off here.)
- Cut Into Squares: Once fully cooled, cut brownies into 24 squares. Wipe your knife between cuts for clean edges. (Kids love helping with this part, but watch those fingers!)
- Melt White Chocolate: Place white chocolate chips in a microwave-safe bowl. Microwave in 20-second bursts, stirring after each, until smooth—usually takes about 1 minute total. (If chocolate seizes, add a teaspoon of coconut oil and stir.)
- Decorate Mummies: Transfer melted white chocolate to a piping bag or zip-top bag. Snip a small corner and drizzle back-and-forth over each brownie, creating zigzag “bandages.” (Imperfection is part of the charm!)
- Add Candy Eyes: Quickly place two candy eyes on each brownie before the chocolate sets. Press gently so they stick. If you want, use black decorating gel for little mouths or extra detail.
- Set the Chocolate: Let decorated brownies sit at room temperature for 15 minutes, or pop in the fridge for 5 if you’re impatient. (Kids will be hovering by now!)
- Serve & Enjoy: Arrange brownies on a platter, scatter extra candy eyes for effect, and watch them disappear. (I always sneak one before the crowd arrives!)
Troubleshooting Tips: If your white chocolate is too thick to drizzle, add a teaspoon of coconut oil and reheat gently. If the brownies seem underbaked, let them cool completely—they’ll firm up. For extra neat mummy wraps, chill brownies before decorating. And if a few “mummies” look more like ghosts, don’t sweat it! That’s half the fun.
Cooking Tips & Techniques
Let’s face it, Halloween baking rarely goes as planned. I’ve made these Spooky Mummy Brownies a dozen times, and here’s what I’ve learned:
- Don’t Overbake: Brownies keep baking as they cool. Pull them out when the edges are set but the center is a little soft. It’s the secret to chewy, fudgy squares.
- Chill Before Decorating: If you can, refrigerate brownies for 30 minutes before adding the mummy wraps. The chocolate sets faster, and you get crisp lines instead of gooey blobs.
- Use a Thin Piping Tip: For the neatest mummy wraps, use a small round tip or snip just a tiny corner off your plastic bag. Thick lines look more like bandages, thin ones are a little more “mummy-ish.”
- Multitasking: Melt the white chocolate while brownies are cooling. Set up a decorating station with candy eyes and piping bags so you’re ready to roll.
- Common Mistakes: Melting chocolate can be tricky. If it seizes, don’t panic—stir in a little coconut oil or shortening and microwave again in short bursts. If you forget the parchment paper, use a butter knife to loosen edges after cooling.
Honestly, I’ve had a few “Pinterest fails” with these—once, I dropped the whole tray and ended up with a pile of broken mummies. We called it “haunted graveyard brownies” and the kids loved it anyway! So, if your decorating isn’t perfect, just roll with it. The best Halloween treats are a little bit messy and a lot of fun.
Variations & Adaptations
One of the best things about Spooky Mummy Brownies is how easy it is to switch things up. Here are some of my favorite tweaks:
- Gluten-Free: Use your favorite gluten-free brownie mix. I’ve tried King Arthur and Bob’s Red Mill—both work great and taste just as rich.
- Dairy-Free: Swap butter for vegan margarine in homemade batter and use Enjoy Life dairy-free white chocolate chips. The texture stays fudgy, and no one will guess they’re dairy-free.
- Flavor Twists: Stir in 1/2 cup (90 g) chocolate chips or chopped Halloween candy into the batter for extra fun. You can also add orange food coloring to the white chocolate for pumpkin mummies!
- Cooking Method: Want thicker brownies? Use an 8×8-inch (20×20 cm) pan and increase baking time by 5-10 minutes. For mini mummy bites, bake in a mini muffin tin and decorate each round.
- Personal Favorite: Last year, I added a swirl of peanut butter on top of the batter before baking—OMG, so good! The salty-sweet combo made them vanish even faster.
- Allergen Substitutions: If nut allergies are a concern, avoid peanut butter and always check your candy eyes for cross-contamination warnings. For egg-free, use flax eggs (1 tbsp ground flax + 3 tbsp water per egg) in homemade batter.
Let your kids pick their favorite candy eyes—there are scary, silly, and even sparkly versions! You can even use coconut flakes for “hair” or add sprinkles for extra Halloween flair. Every batch can be a little different, which keeps things fresh year after year.
Serving & Storage Suggestions
These Spooky Mummy Brownies are best served at room temperature, arranged on a festive platter with extra candy eyes or Halloween sprinkles scattered around. I love pairing them with cold milk or a mug of hot cocoa—seriously, it’s the ultimate cozy treat after trick-or-treating.
If you’re hosting a party, stack the brownies in a pyramid or lay them out in a “graveyard” scene with toy skeletons. For adults, they’re delicious with strong coffee or chai. If you want to go all out, serve alongside pumpkin cupcakes or caramel-dipped apples for a full Halloween dessert table.
Storage: Store brownies in an airtight container at room temperature for up to 3 days. For longer storage, pop them in the fridge—they’ll stay fresh for about a week, but the candy eyes might get a little “frosty.” To freeze, wrap brownies individually in plastic wrap and store in a freezer-safe bag. Thaw at room temperature before serving. If the white chocolate looks dull after a few days, a quick 10-second zap in the microwave will bring back the shine.
Honestly, the flavors deepen after a day or two—the chocolate gets richer and the brownies become even chewier. I’ve hidden a few in the back of the fridge and they tasted amazing days later (if the kids don’t find them first!).
Nutritional Information & Benefits
| Serving Size | Calories | Carbs | Protein | Fat | Allergens |
|---|---|---|---|---|---|
| 1 brownie (1/24 batch) | ~140 | 20g | 2g | 7g | wheat, eggs, dairy (unless using substitutions) |
Key ingredients like cocoa powder offer antioxidants, and swapping in coconut oil or whole wheat flour can boost nutrition a bit. If you use dairy-free and gluten-free adaptations, these brownies fit more dietary needs. Candy eyes and white chocolate add sugar, so they’re a treat—not an everyday snack! If you have allergies, double-check your candy eyes and chocolate for cross-contamination.
Personally, I think a little indulgence is part of the fun—especially when it brings everyone together. These Spooky Mummy Brownies are a sweet way to celebrate the season while making sure everyone gets a piece of the spooky action.
Conclusion
If you’re searching for easy Halloween treats kids love, look no further than these Spooky Mummy Brownies. They’re simple, festive, and guaranteed to spark joy at any October gathering. Whether you’re a busy parent, a baking beginner, or just a lover of all things Halloween, this recipe is a must-try.
Feel free to experiment—add flavors, swap ingredients, or create your own monster designs. That’s the beauty of this recipe: every batch is a little different, and every bite is a memory. Honestly, these brownies make me smile every time I make them. They’re part treat, part tradition, and 100% fun.
If you give these Spooky Mummy Brownies a go, let me know in the comments! Share your photos, your wildest mummy faces, and any creative twists you tried. Happy haunting and happy baking—may your kitchen be filled with laughter, chocolate, and just a touch of Halloween magic!
FAQs
Can I make Spooky Mummy Brownies ahead of time?
Yes! Bake and decorate up to 2 days before your event. Store in an airtight container at room temp—the candy eyes may soften slightly but still look cute.
What if I can’t find candy eyes?
No worries! Use mini chocolate chips, M&Ms, or pipe dots of white and black icing for eyes. Homemade works just as well.
Can I freeze mummy brownies?
Absolutely. Wrap each brownie in plastic and freeze in a zip-top bag for up to 2 months. Thaw at room temperature before serving.
How do I melt white chocolate without burning it?
Microwave in 20-second bursts, stirring after each, or use a double boiler on the stovetop. If it seizes, add a little coconut oil and stir gently.
Can I use homemade brownie batter instead of box mix?
Definitely! Use your favorite from-scratch recipe. Just make sure it’s fudgy so the brownies hold up to decorating. Adjust baking time as needed.
Pin This Recipe!
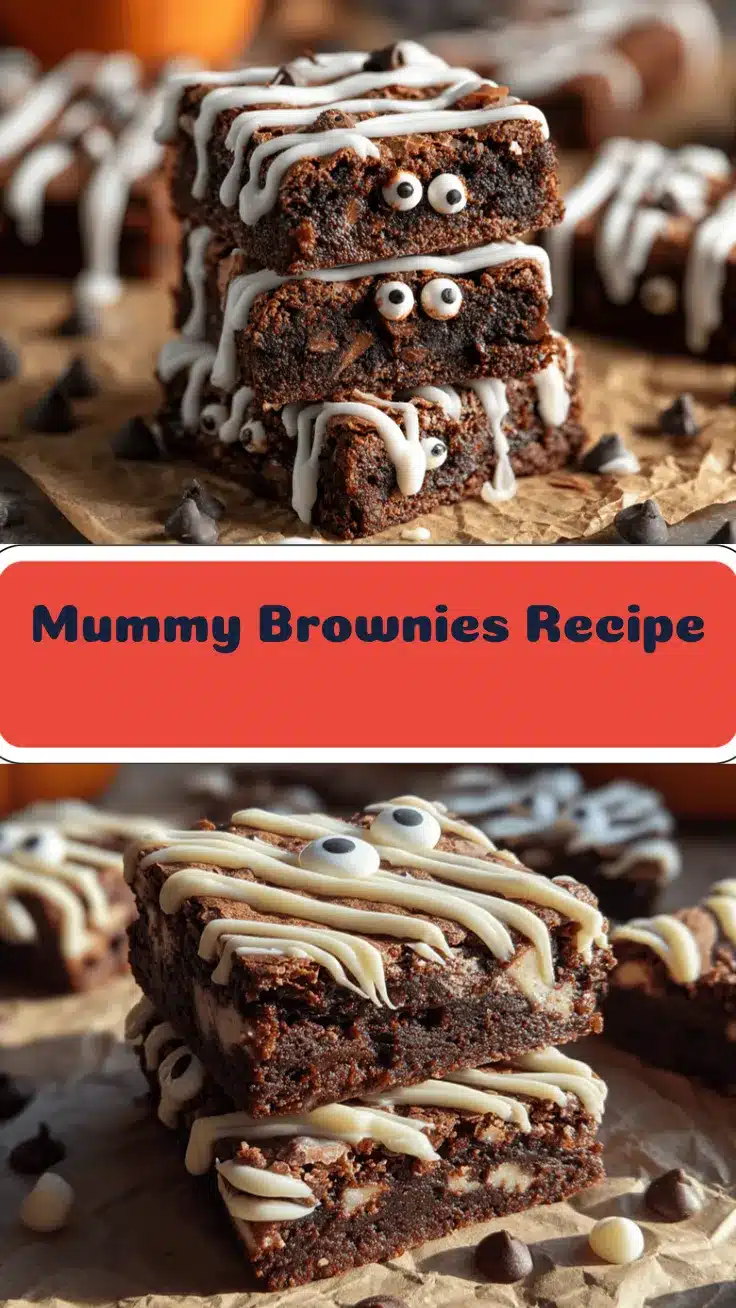
Spooky Mummy Brownies
- Total Time: 45 minutes
- Yield: 24 brownies 1x
Description
These Spooky Mummy Brownies are a fun, easy Halloween treat featuring fudgy brownies decorated with white chocolate ‘bandages’ and candy eyes. Perfect for parties, classroom celebrations, or a festive family baking night—kids love helping decorate these adorable, spooky sweets.
Ingredients
- 1 box brownie mix (18–20 oz, any brand)
- 2 large eggs, room temperature
- 1/2 cup vegetable oil (or melted coconut oil)
- 1/4 cup water (or brewed coffee)
- OR for homemade brownies:
- 1 cup all-purpose flour
- 1/2 cup unsweetened cocoa powder
- 1 cup granulated sugar
- 1/2 cup unsalted butter, melted
- 2 large eggs
- 1/4 tsp salt
- 1/2 tsp vanilla extract
- For decoration:
- 1 cup white chocolate chips or melting wafers
- 24 candy eyes
- Optional: black decorating gel
Instructions
- Preheat oven to 350°F (175°C). Line a 9×13-inch pan with parchment paper, leaving an overhang for easy removal.
- In a large bowl, combine brownie mix, eggs, oil, and water (or coffee). Stir until just combined. For homemade batter, whisk melted butter and sugar, then add eggs and vanilla. Stir in flour, cocoa, and salt until smooth.
- Pour batter into prepared pan and spread evenly. Bake for 25-30 minutes (box mix) or 30-35 minutes (homemade) until edges are set and a toothpick comes out with a few moist crumbs.
- Let brownies cool in the pan for 10 minutes, then lift out using parchment and cool completely on a wire rack.
- Once cooled, cut brownies into 24 squares. Wipe knife between cuts for clean edges.
- Place white chocolate chips in a microwave-safe bowl. Microwave in 20-second bursts, stirring after each, until smooth (about 1 minute total). If chocolate seizes, add a teaspoon of coconut oil and stir.
- Transfer melted white chocolate to a piping bag or zip-top bag. Snip a small corner and drizzle back-and-forth over each brownie to create zigzag ‘bandages.’
- Quickly place two candy eyes on each brownie before chocolate sets. Press gently so they stick. Optionally, use black decorating gel for mouths or extra detail.
- Let decorated brownies sit at room temperature for 15 minutes, or refrigerate for 5 minutes to set chocolate.
- Arrange brownies on a platter and serve. Store leftovers in an airtight container at room temperature for up to 3 days.
Notes
For gluten-free, use your favorite GF brownie mix. For dairy-free, swap butter for vegan margarine and use dairy-free white chocolate. Chill brownies before decorating for neater mummy wraps. If white chocolate is too thick, add a teaspoon of coconut oil and reheat gently. Kids love helping with decorating—imperfection adds charm!
- Prep Time: 15 minutes
- Cook Time: 30 minutes
- Category: Dessert
- Cuisine: American
Nutrition
- Serving Size: 1 brownie (1/24 batch)
- Calories: 140
- Sugar: 15
- Sodium: 90
- Fat: 7
- Saturated Fat: 3
- Carbohydrates: 20
- Fiber: 1
- Protein: 2
Keywords: Halloween, brownies, mummy brownies, kid-friendly, party treats, easy dessert, spooky, chocolate, holiday baking